The July Oven card
Your June oven, on your Home Assistant dashboard, working locally. This walkthrough covers every screen of the card: starting a cook, watching it, the camera, the cook history, several ovens, and the settings.
Add the card to a dashboard
The card ships inside the June Oven integration. Once the integration is installed, the card is already loaded on every dashboard.
- Install the integrationIn HACS, add the custom repository
prj-july/ha-june-ovenas an Integration, open June Oven and select Download. - Restart Home AssistantRestart when HACS reports Pending restart, then pair the oven from Settings › Devices & services.
- Add the cardEdit a dashboard, select Add card and search for July Oven. Pick your oven and an icon.
- Allow remote startOn the oven itself, open Settings › App permissions so the card can start cooks.
Prefer YAML? One line is enough; everything else has a sensible default and can be changed later in the card's own Settings.
type: custom:july-oven-card
entity: climate.kitchen_oven
icon: kitchen            # optional
What you see when the oven is off
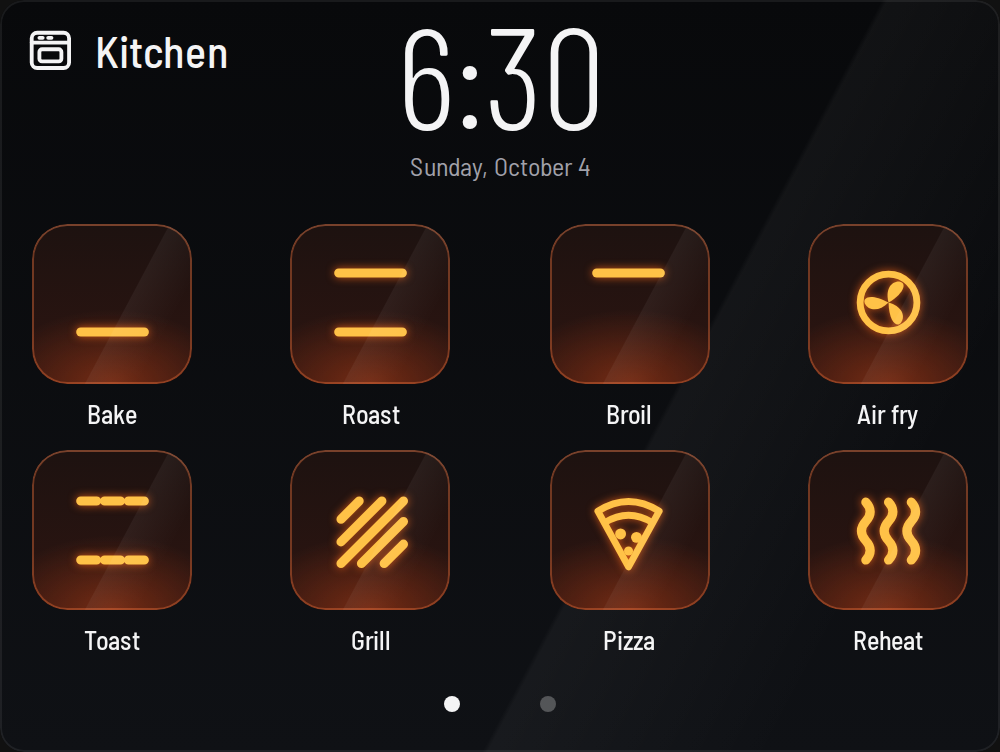
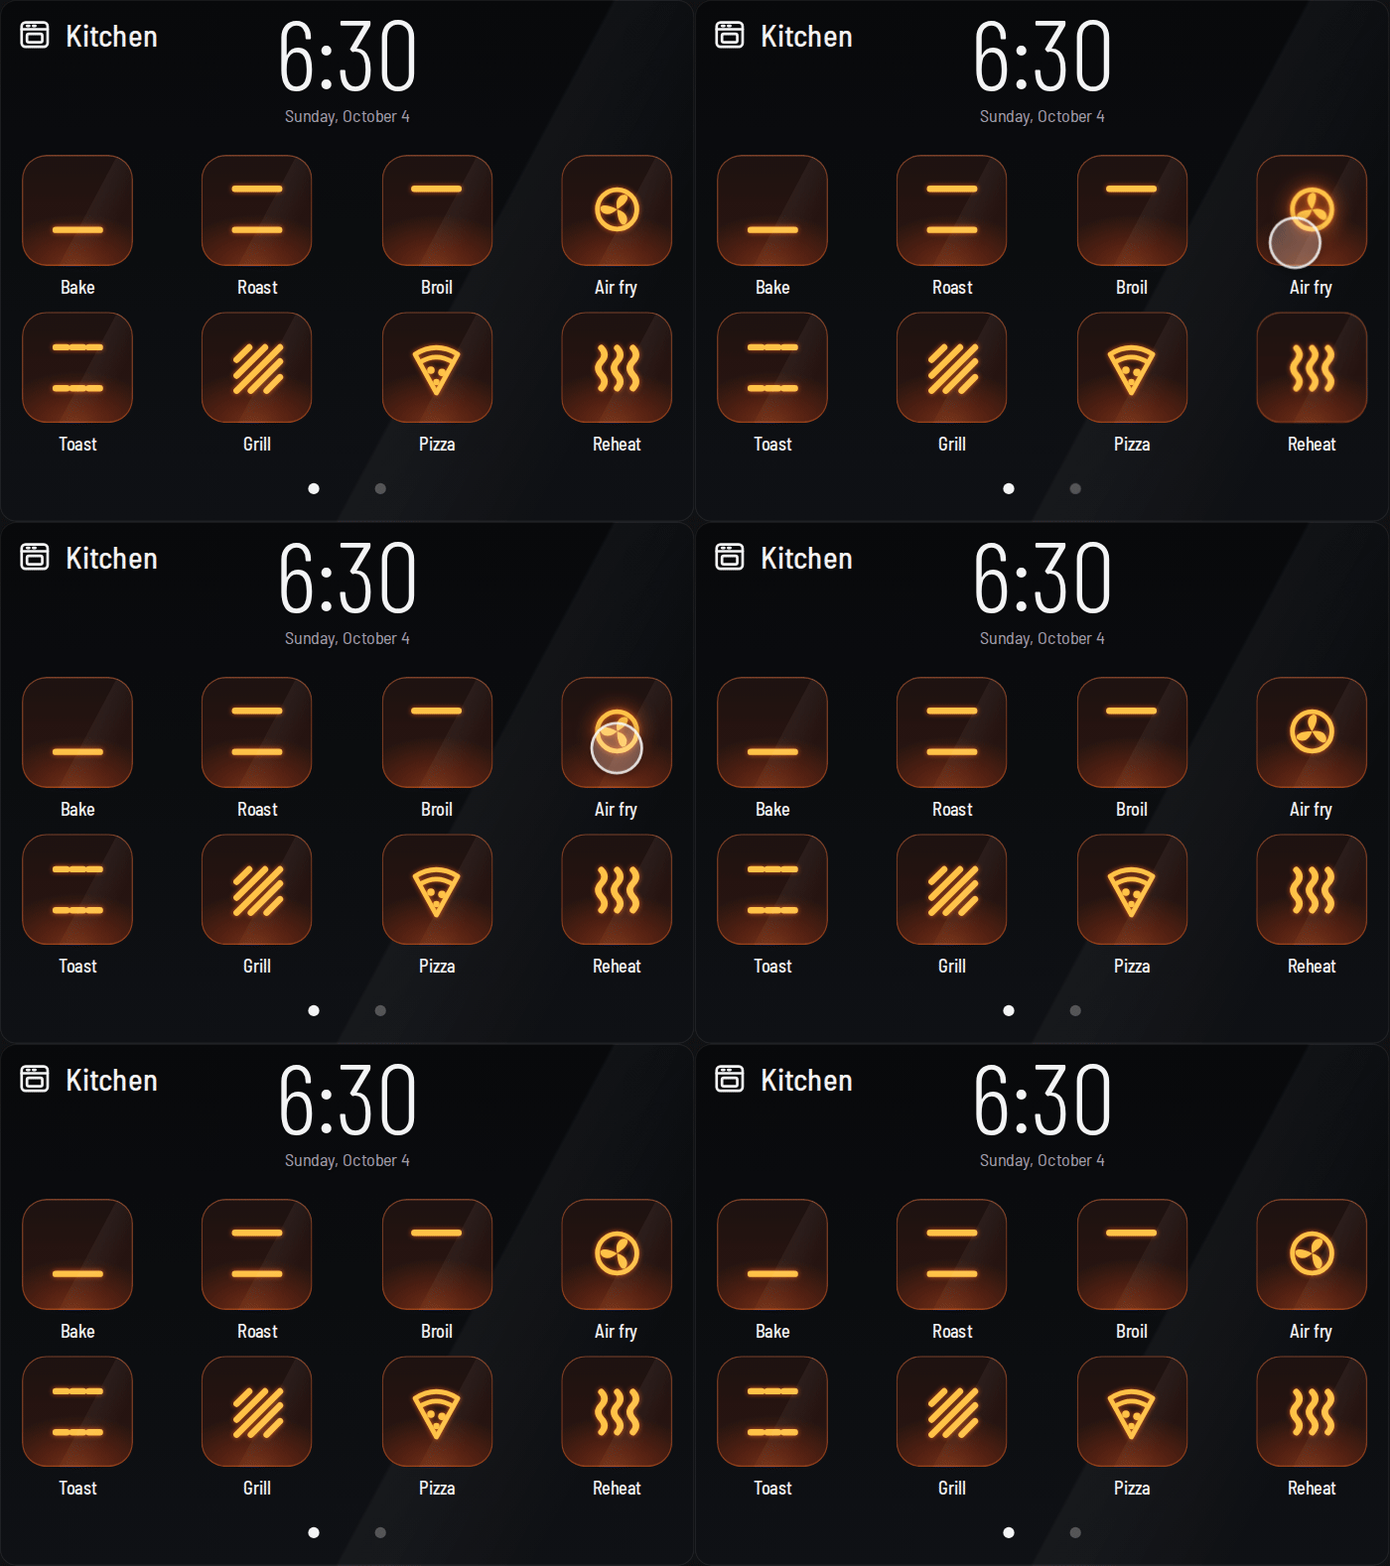
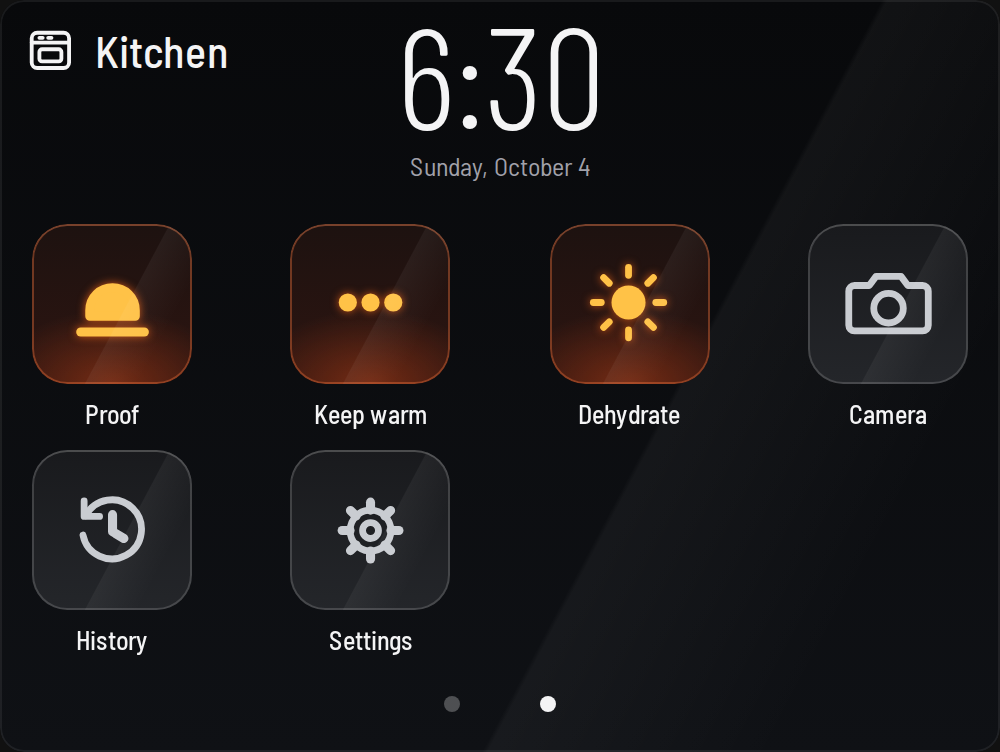
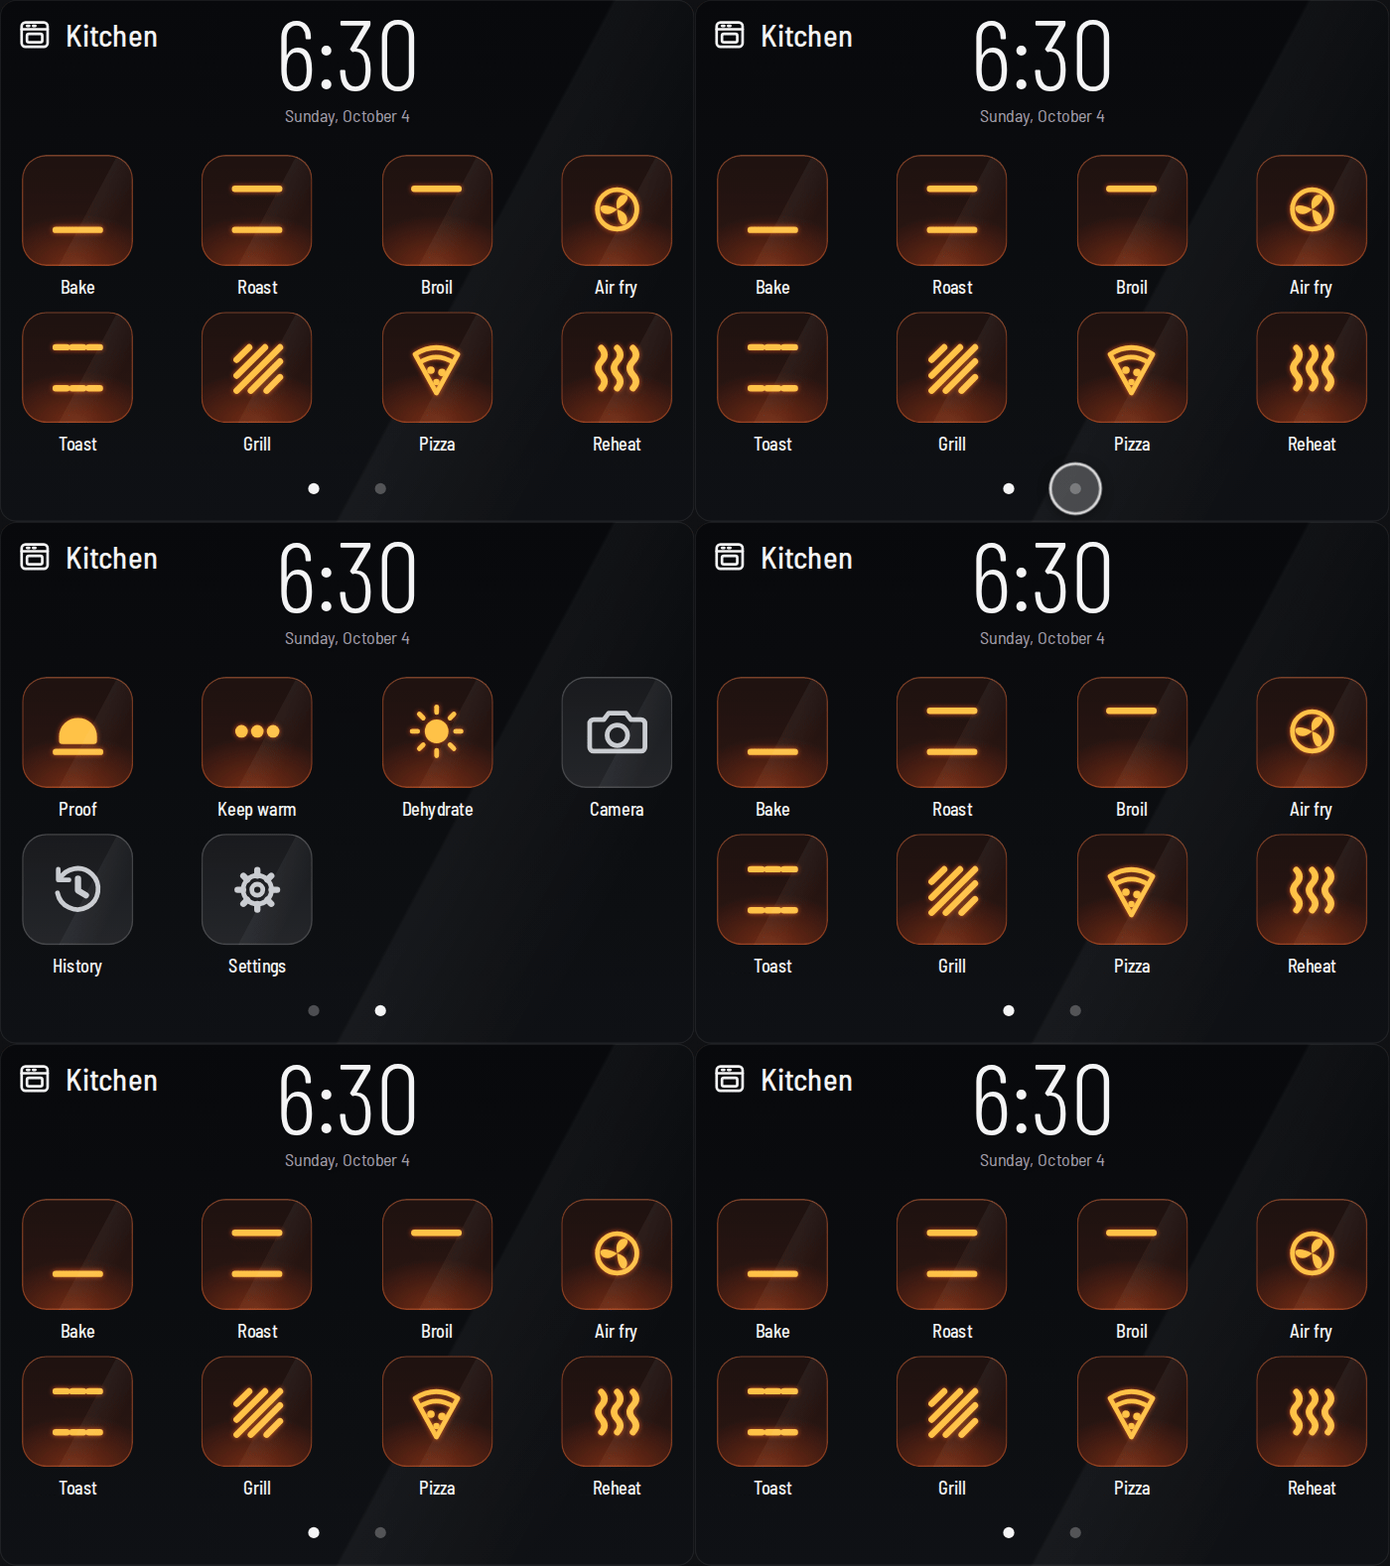
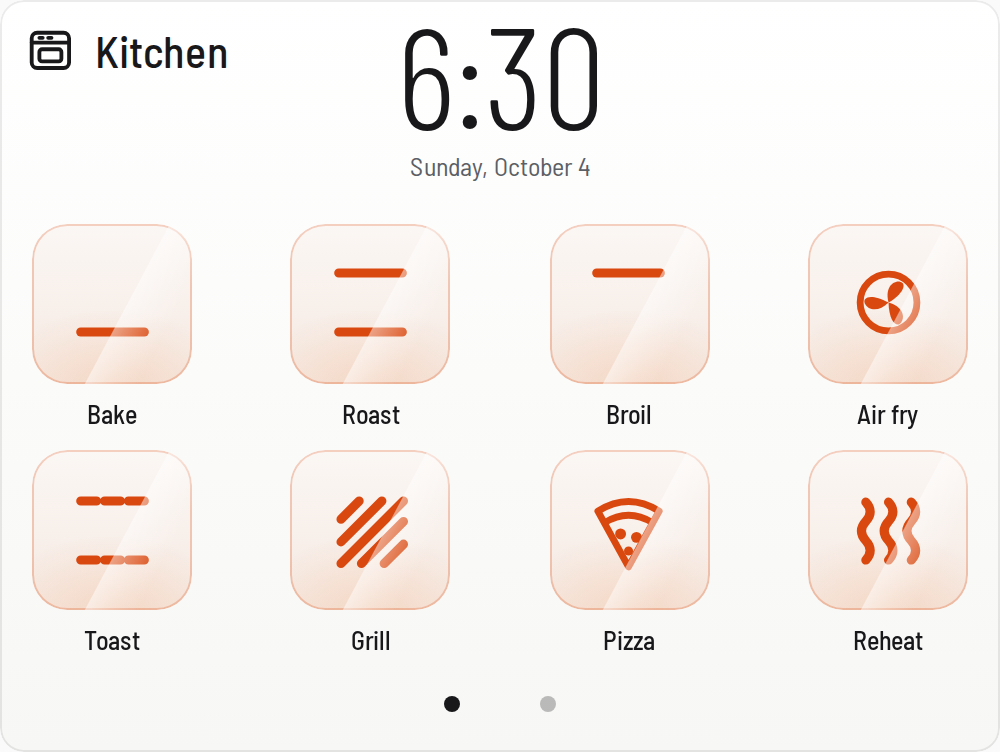
The card shows the oven's own home screen: a clock and pages of cook modes, laid out and drawn like the tiles on the oven's touchscreen.
1
2
3
4
- 1The oven's icon is its lampOrange while the oven heats, white while it's off. Tap it to open the oven menu.
- 2Clock12 or 24 hour follows your locale, or set it in Settings.
- 3Cook mode tilesDrawn the way the oven draws them: the glow lines show the heating elements (bottom for Bake, top for Broil, both for Roast), a fan for Air fry, waves for Reheat.
- 4More pagesSwipe, or tap a dot. Page 2 holds Proof, Keep warm, Dehydrate, and the Camera, History and Settings tiles.
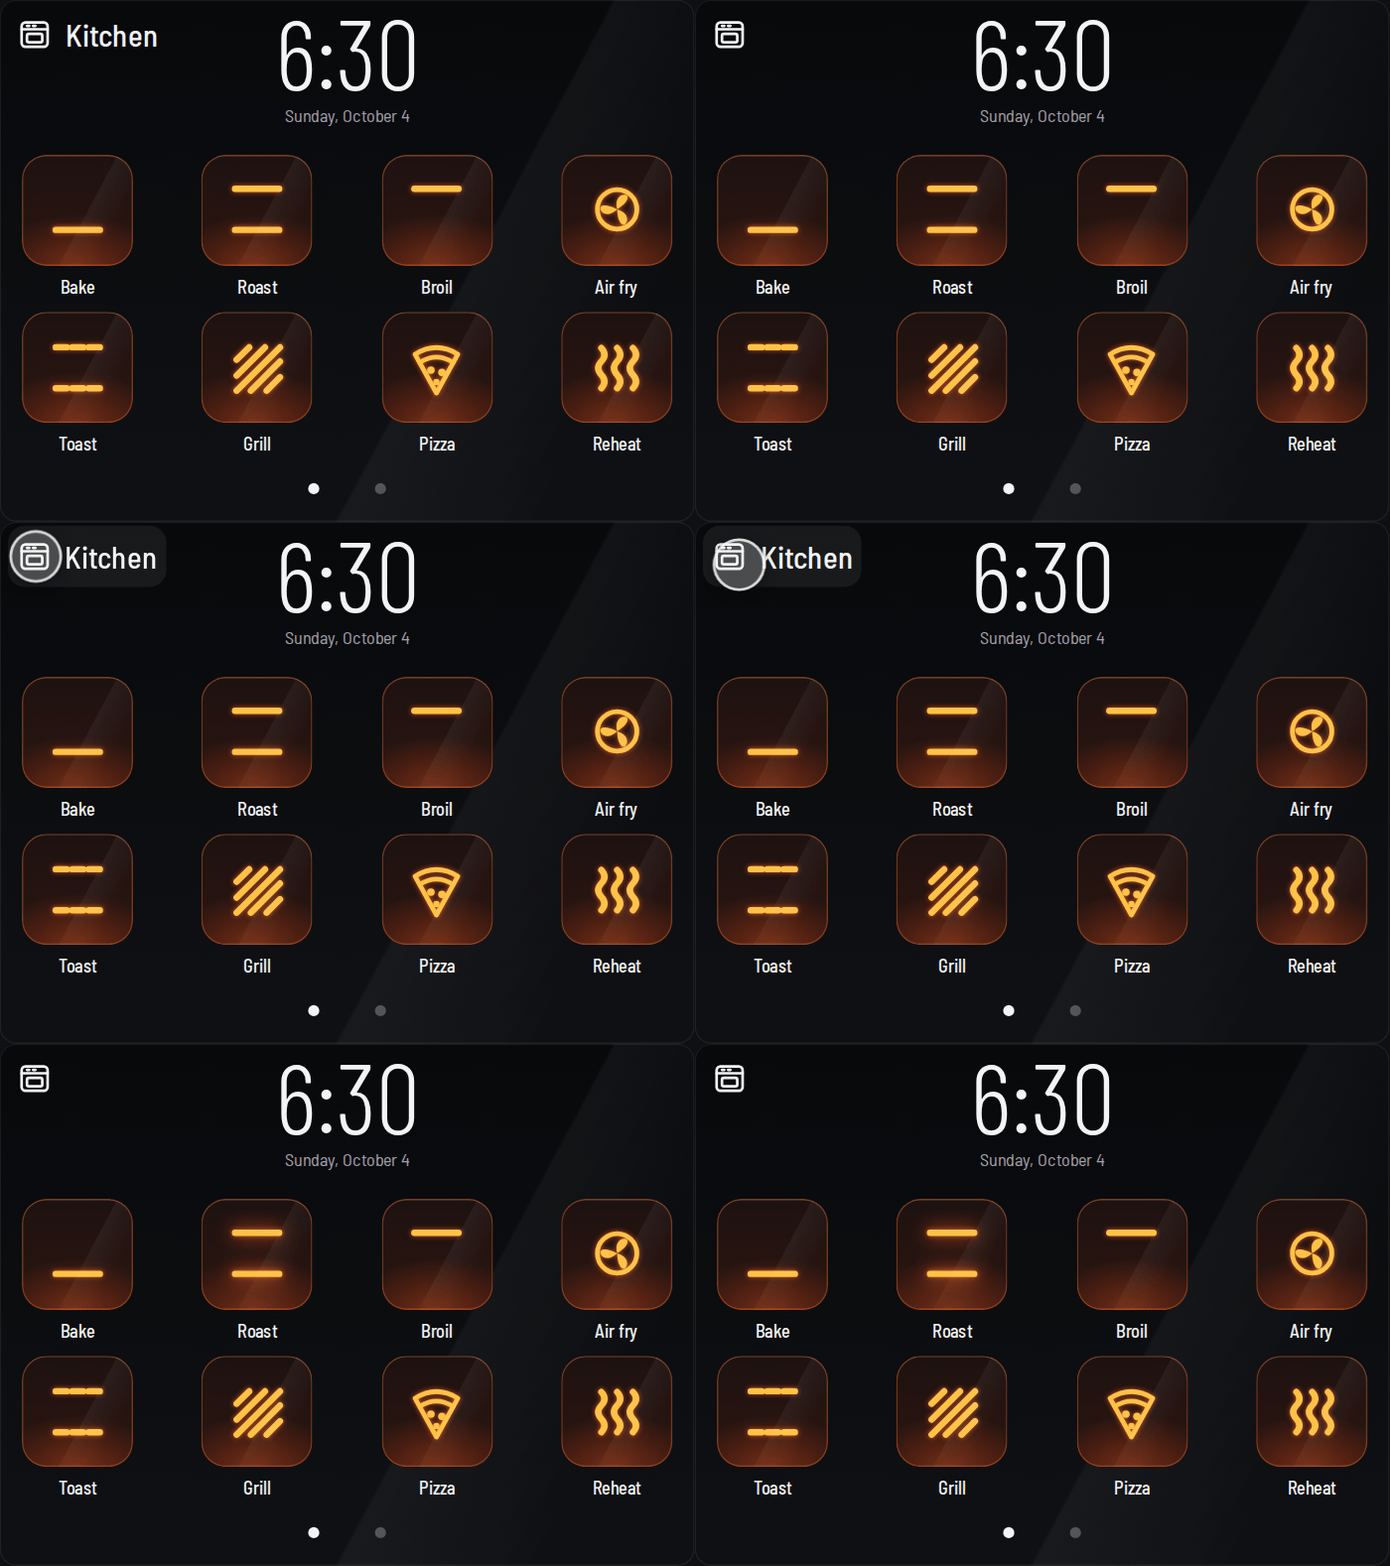
Slow cook still shows by name when you start it on the oven or in the June app; starting it from the card comes later.
Prefer your favourites up front? Set Cook modes to Most used first in Settings and the tiles reorder by how often you start each mode from this card. Mode layout sets how many columns and rows of tiles you get.
Tap a mode, check it, start it
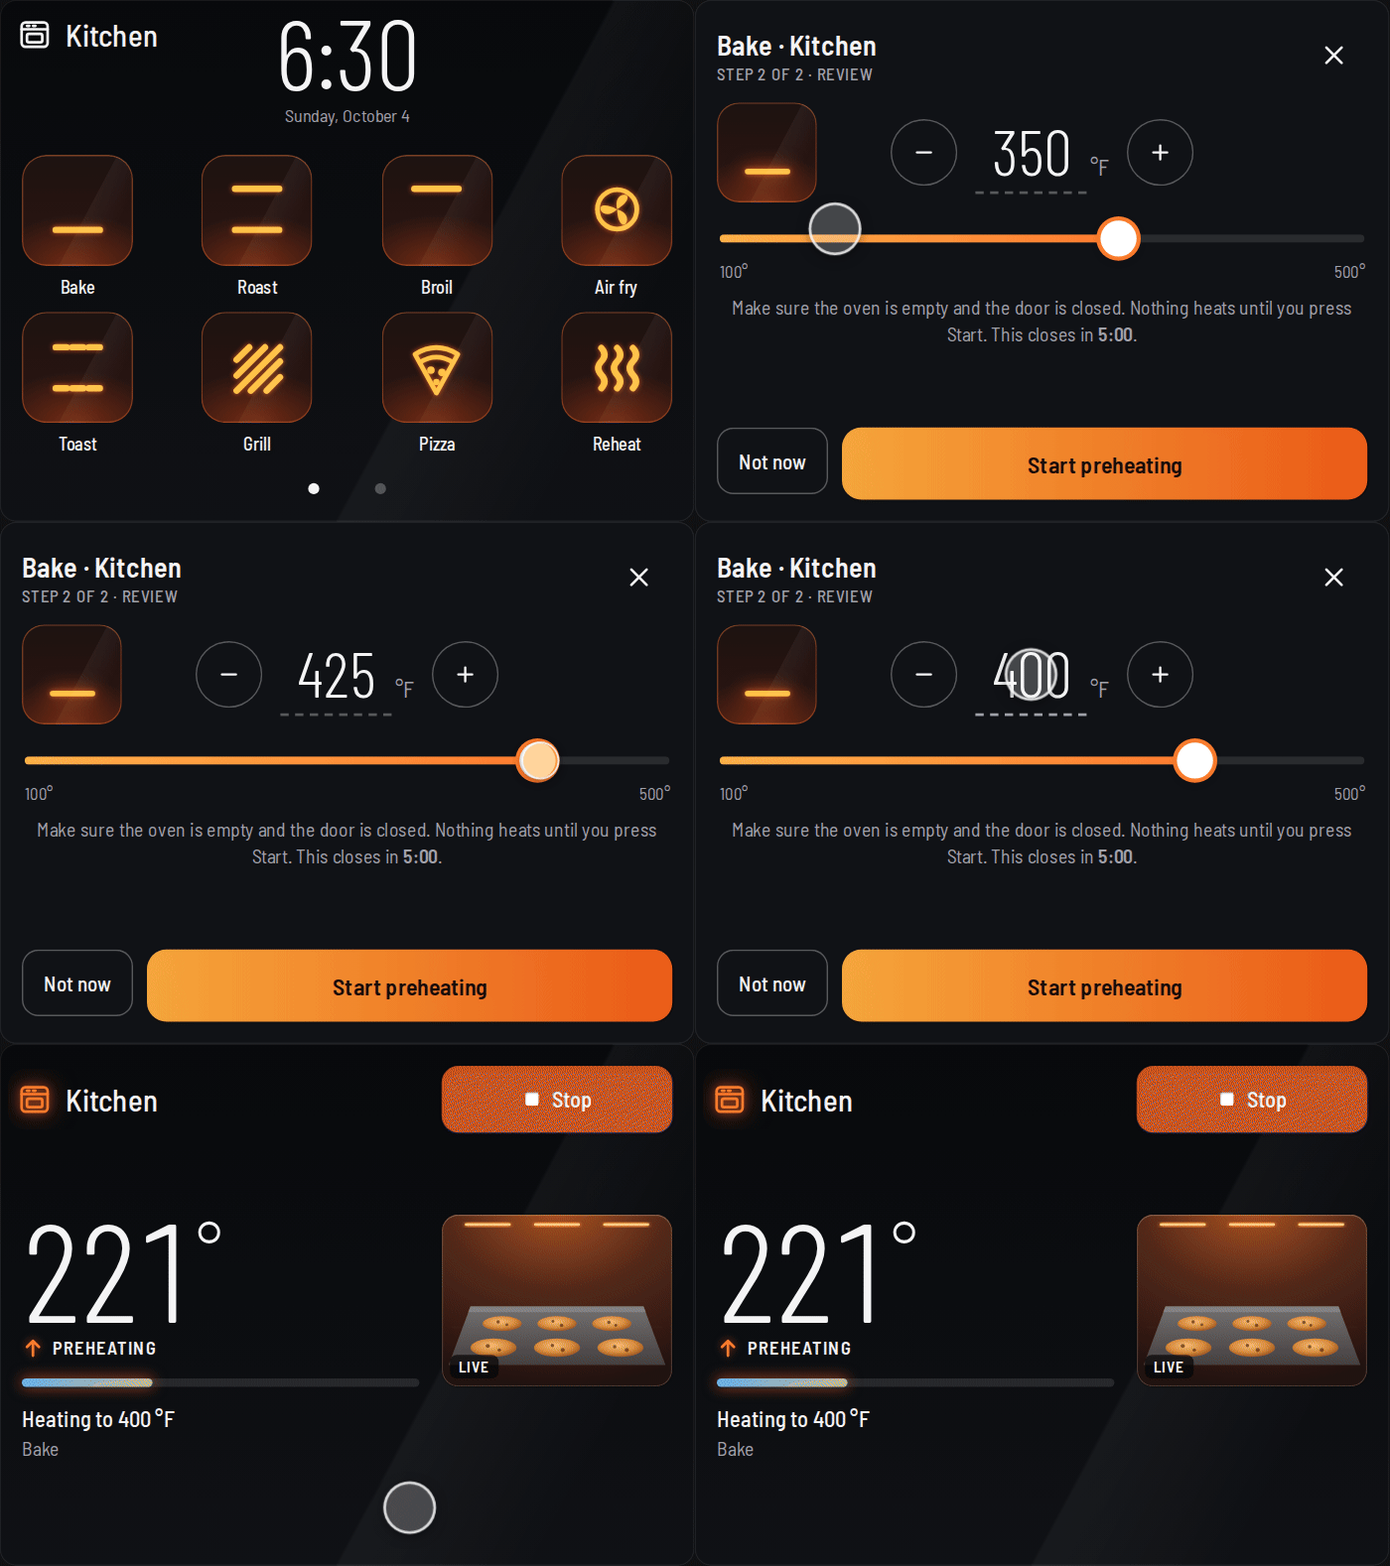
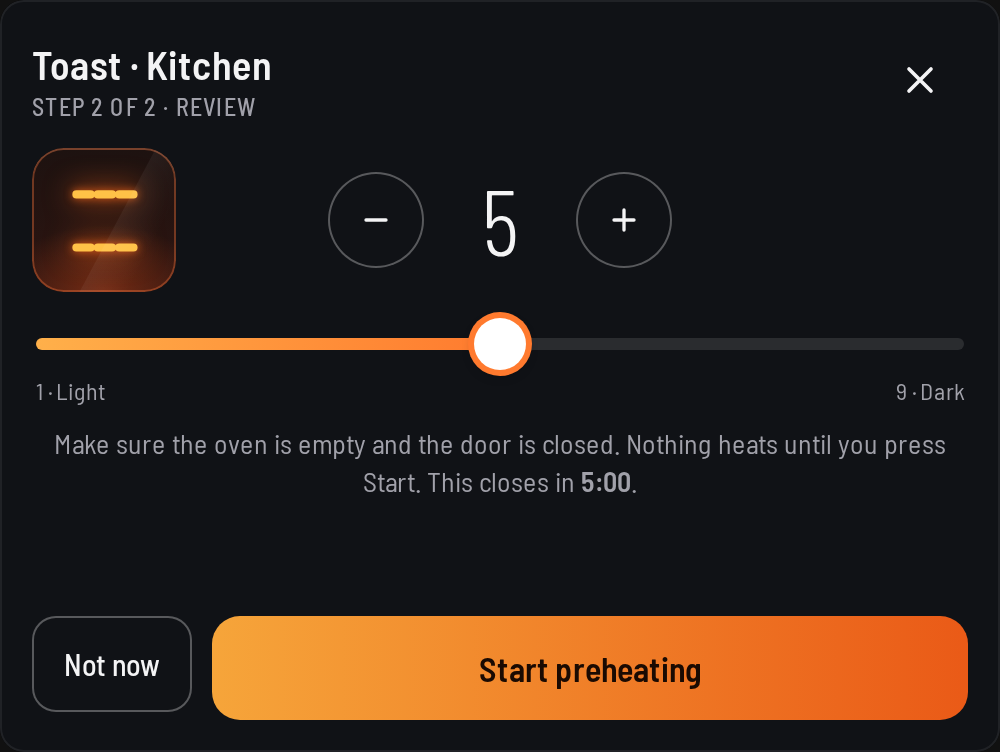
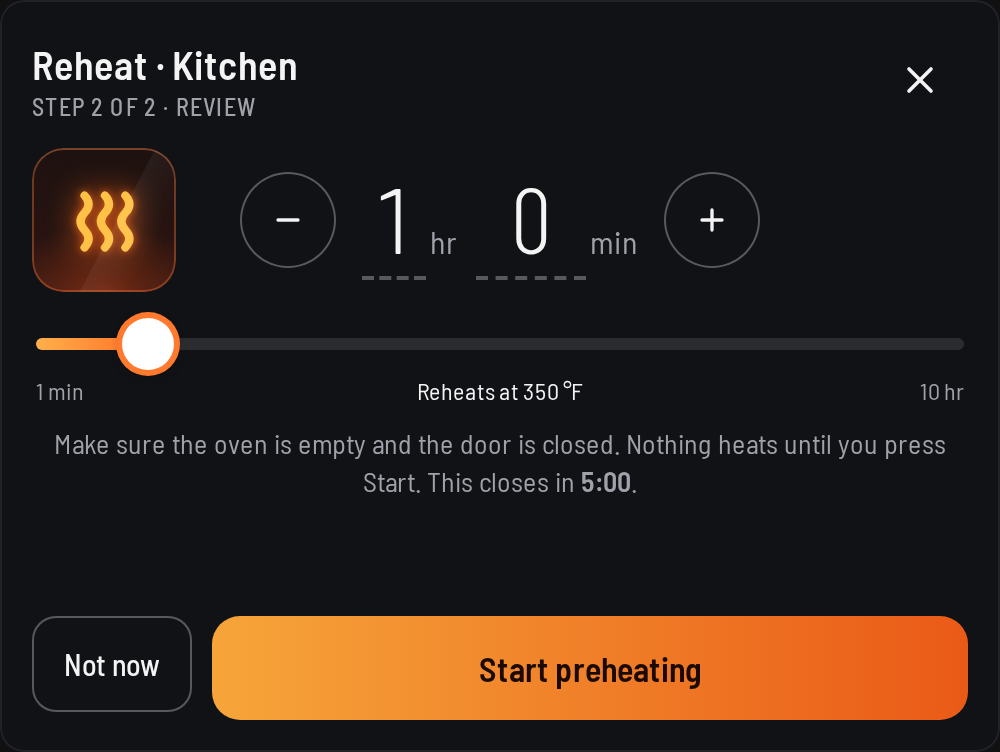
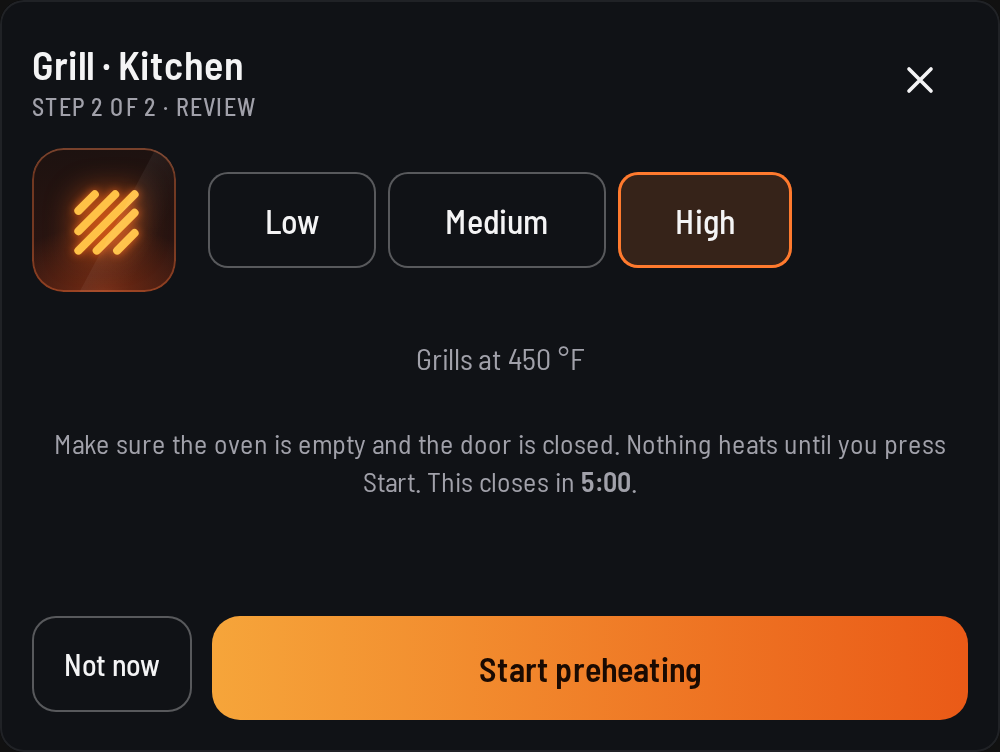
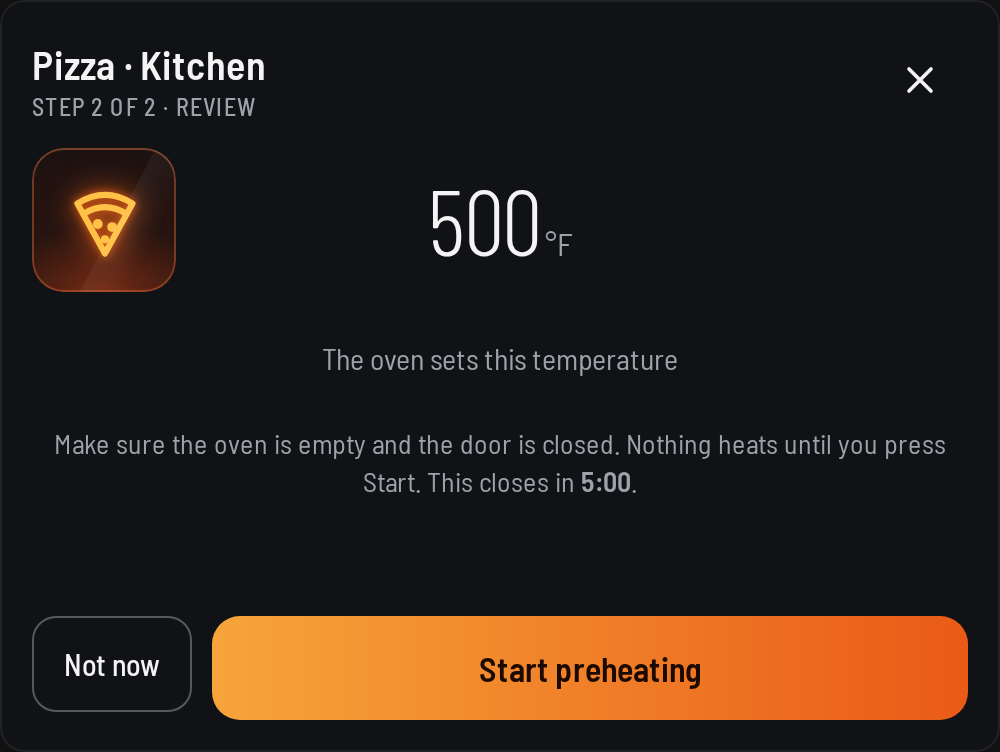
Nothing heats on one tap. Every mode opens a review first, and the oven only starts when you press Start preheating. Every review has the same layout: the mode's tile on the left, one large control in the middle with − and +, and a slider or a single line under it.
One big number, one red Stop
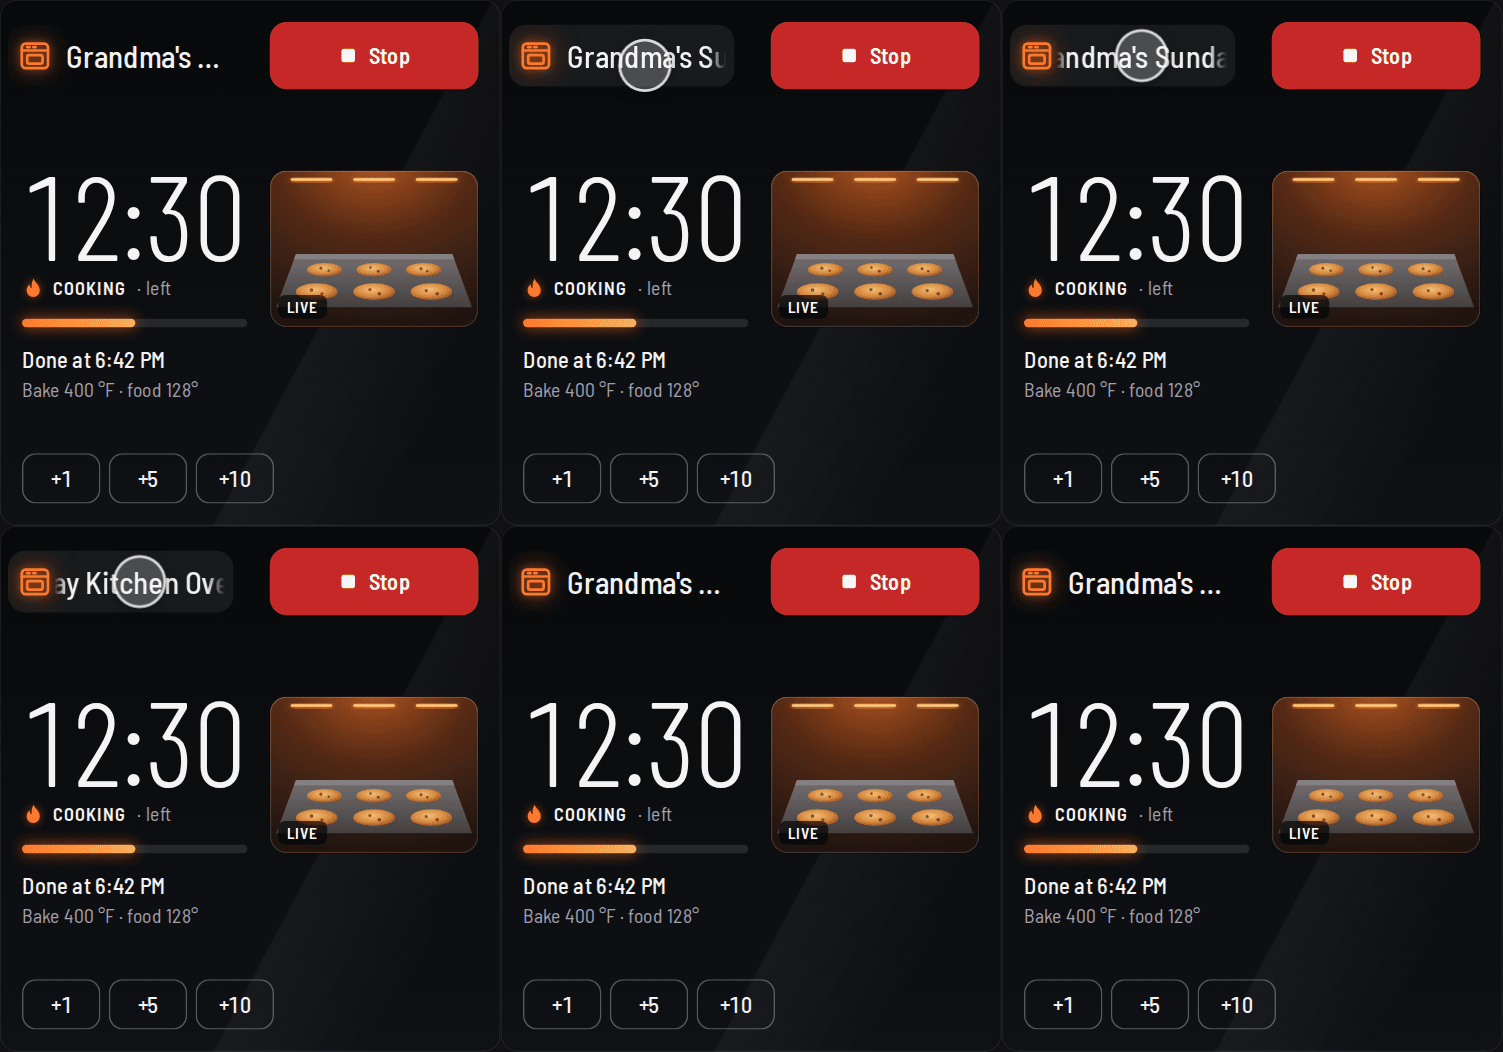
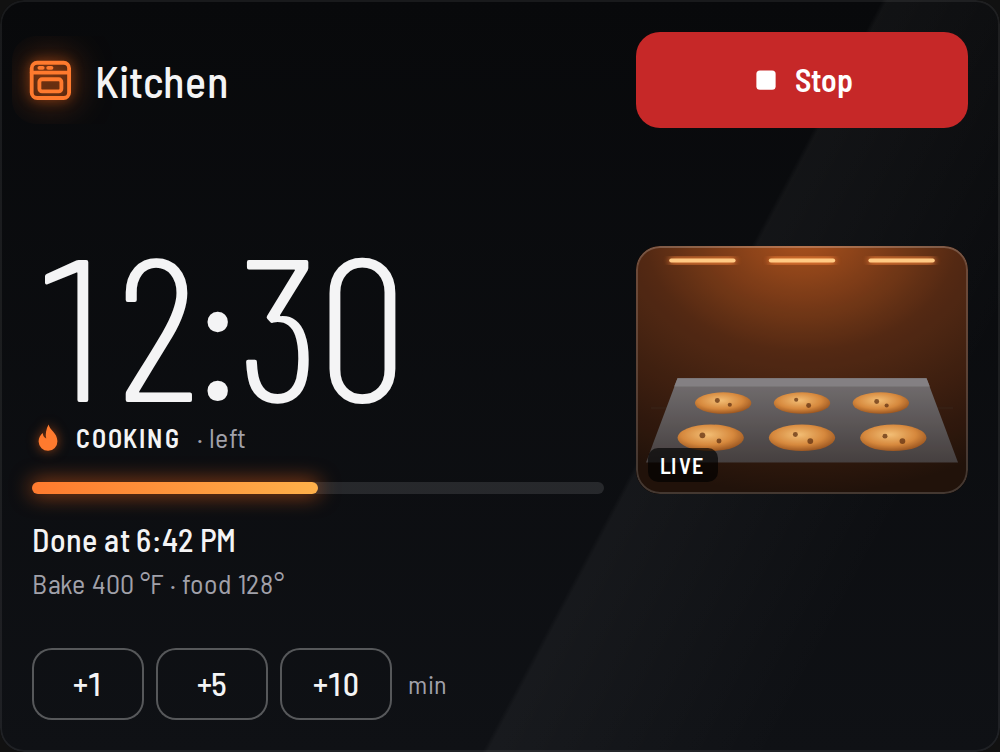
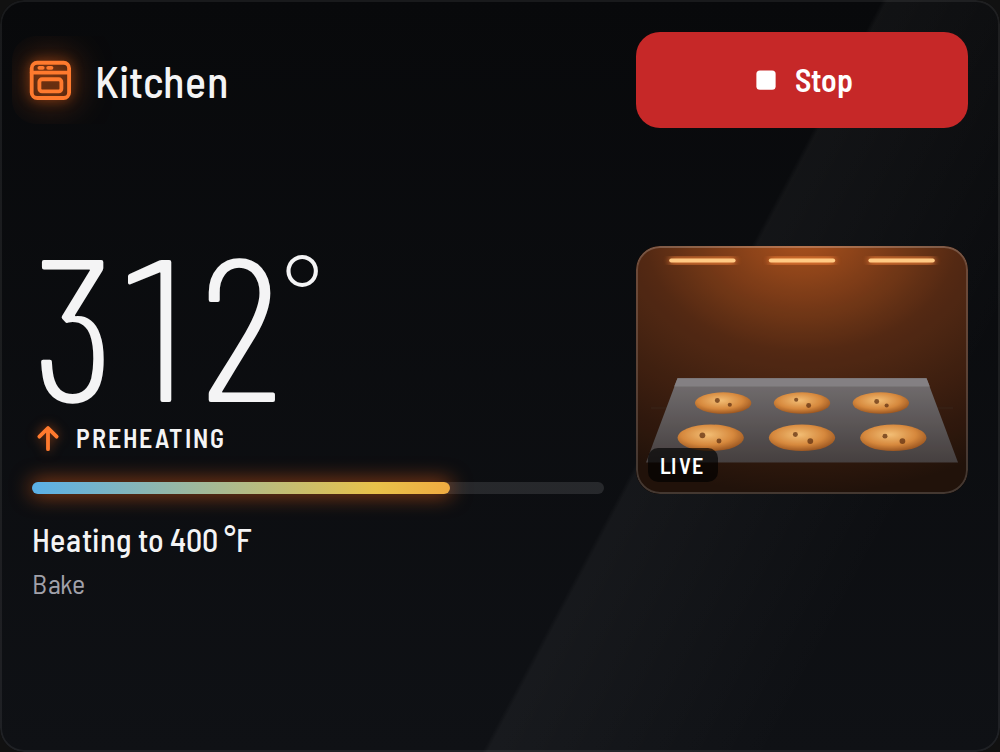
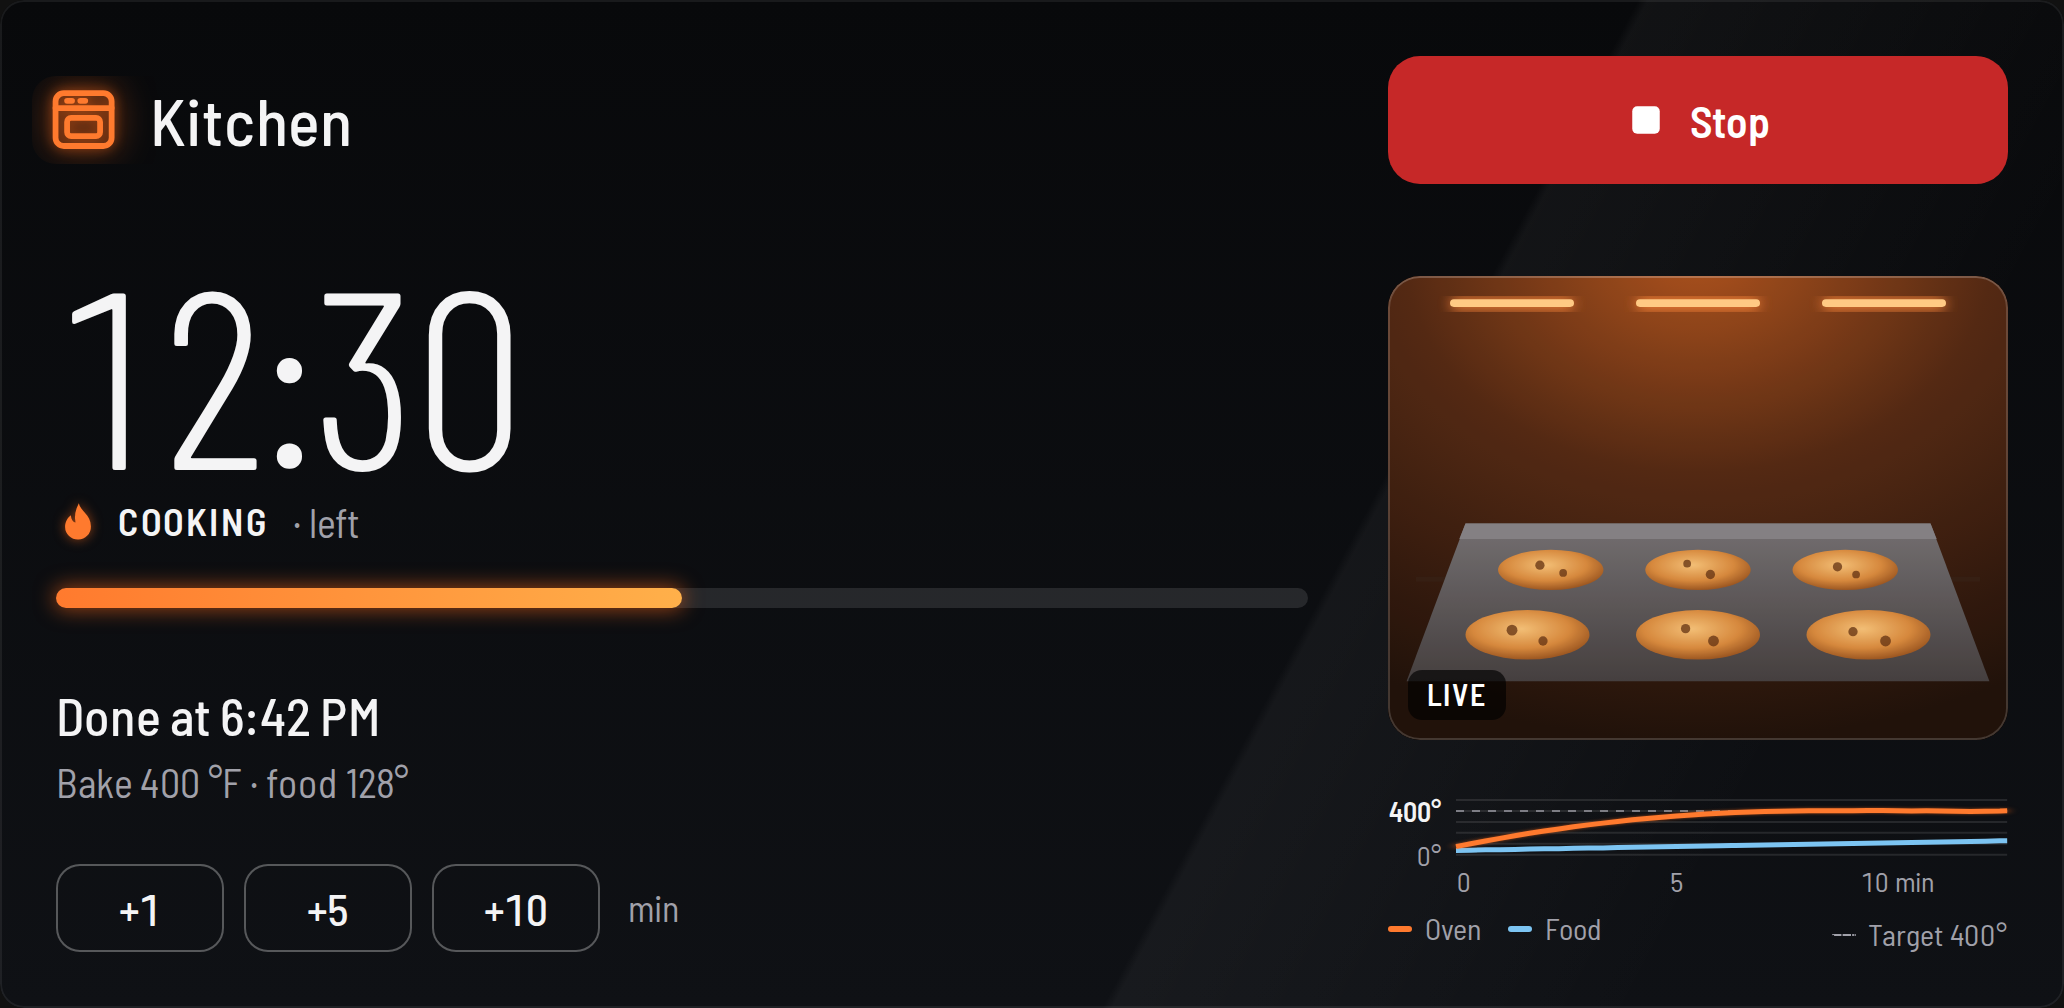
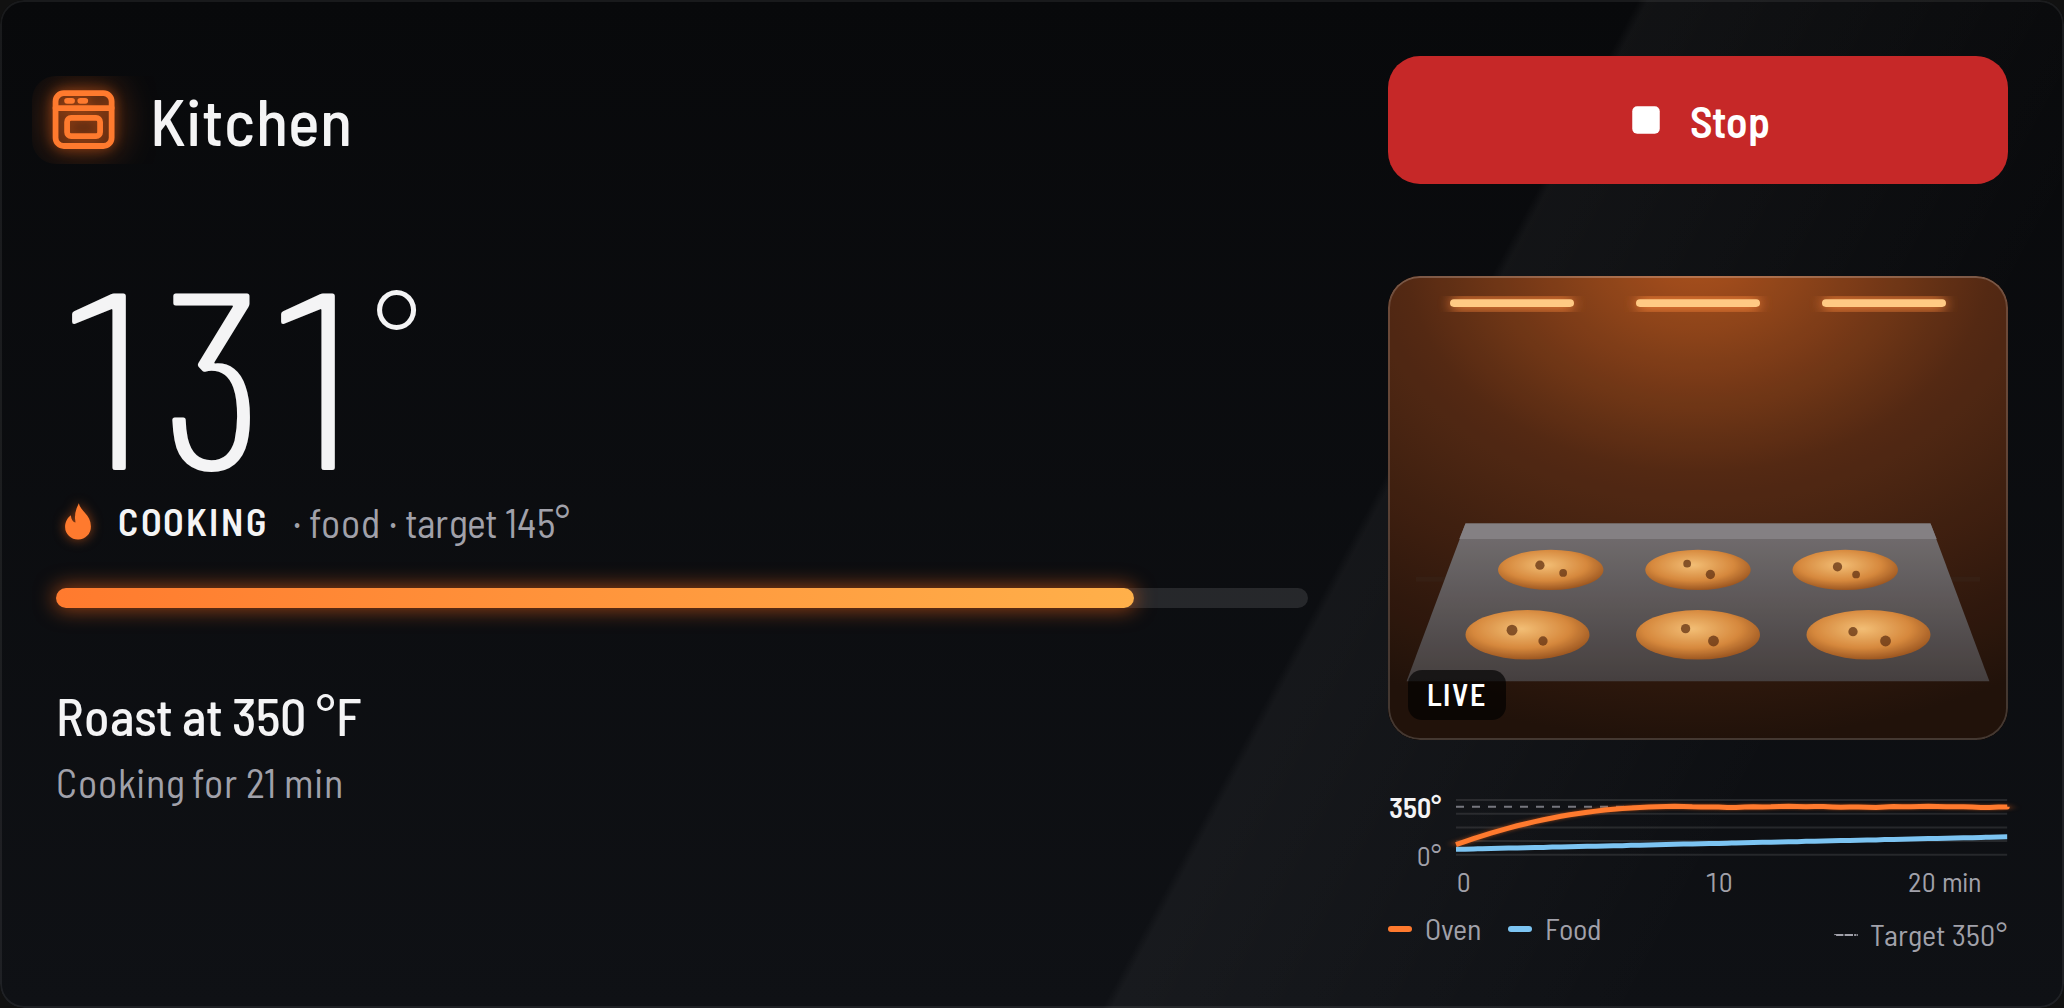
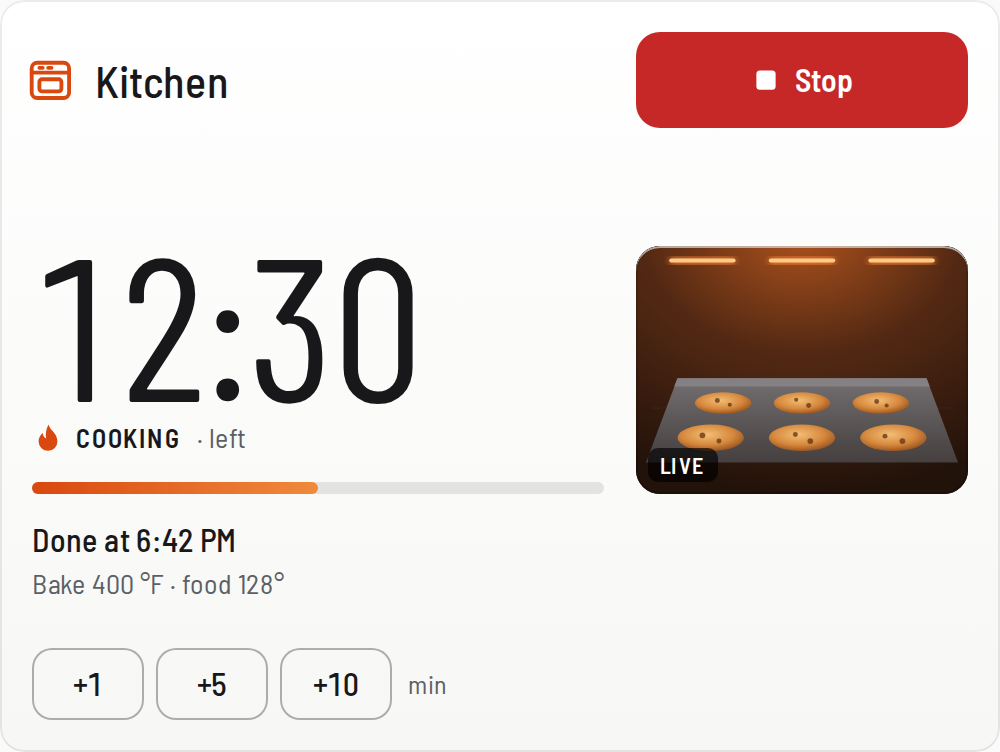
Everything stays in the same place from preheat to done, so you can read the card from across the kitchen.
 1
2
3
4
5
6
7
1
2
3
4
5
6
7
- 1Lit iconOrange means the oven is heating.
- 2StopAlways top right, always red, never asks "are you sure". With several ovens it names the oven it stops.
- 3The big numberTime left while a timer runs; otherwise the oven temperature, or the food temperature during a probe cook.
- 4Status and progressA mark, a colour and a word: preheating, ready, cooking, done or offline.
- 5Two short linesWhen it will be done, then the mode, set temperature and food temperature.
- 6Add time+1, +5 and +10 min appear only while a timer runs.
- 7CameraA new picture about once a second while the oven heats. Tap for the big window.
A window into the oven
Tap the picture on the card, or the Camera tile on the home screen, and a larger camera window opens over the card. × or Escape closes it.
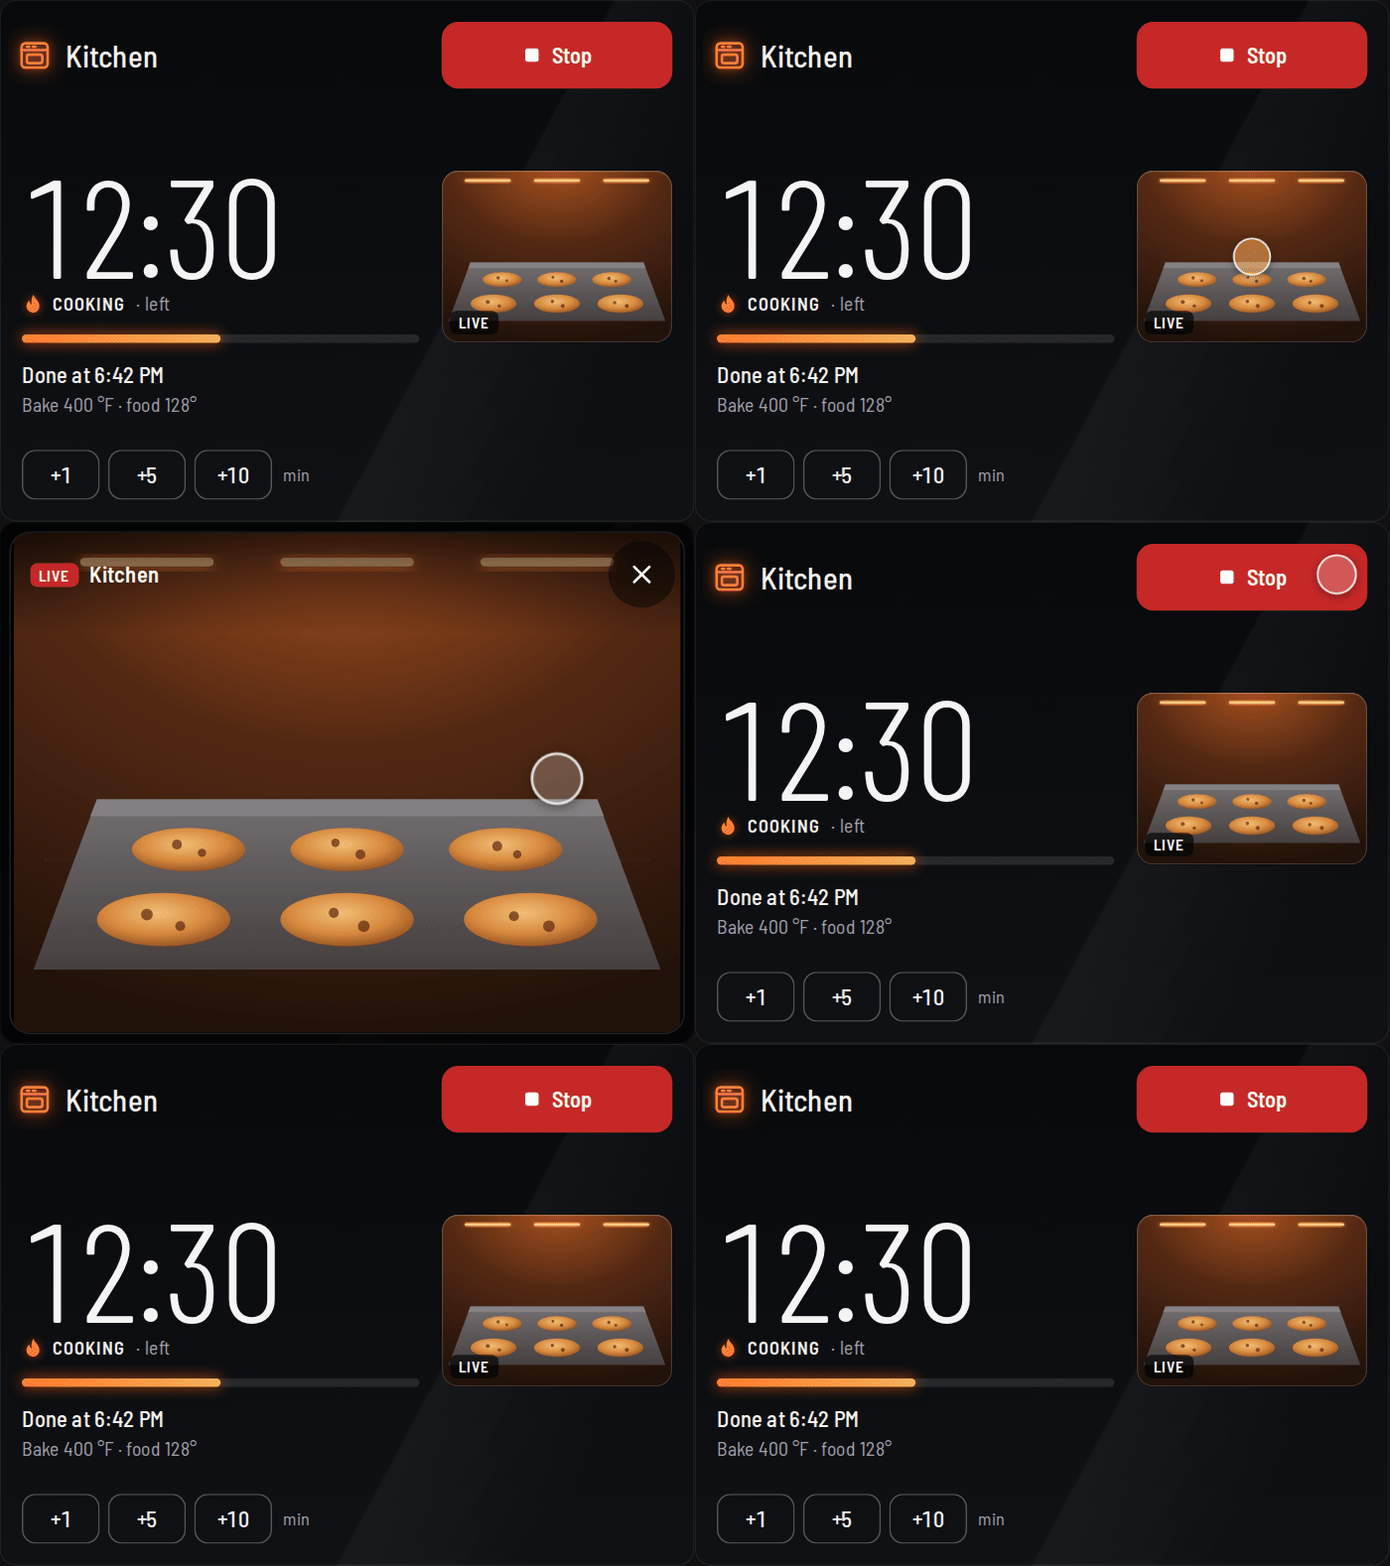
June's camera isn't a video stream. While it heats, the oven sends a still picture about once a second, and the card shows the newest one.
The window checks for new pictures at the camera frame rate you pick in Settings: 1, 5, 10 or 15 per second. 15 is the default, so a new picture shows the moment it arrives. 1 fps matches the stock June app and loads the fewest pictures from Home Assistant.
The small picture on the card refreshes at most once a second.
Every cook, kept
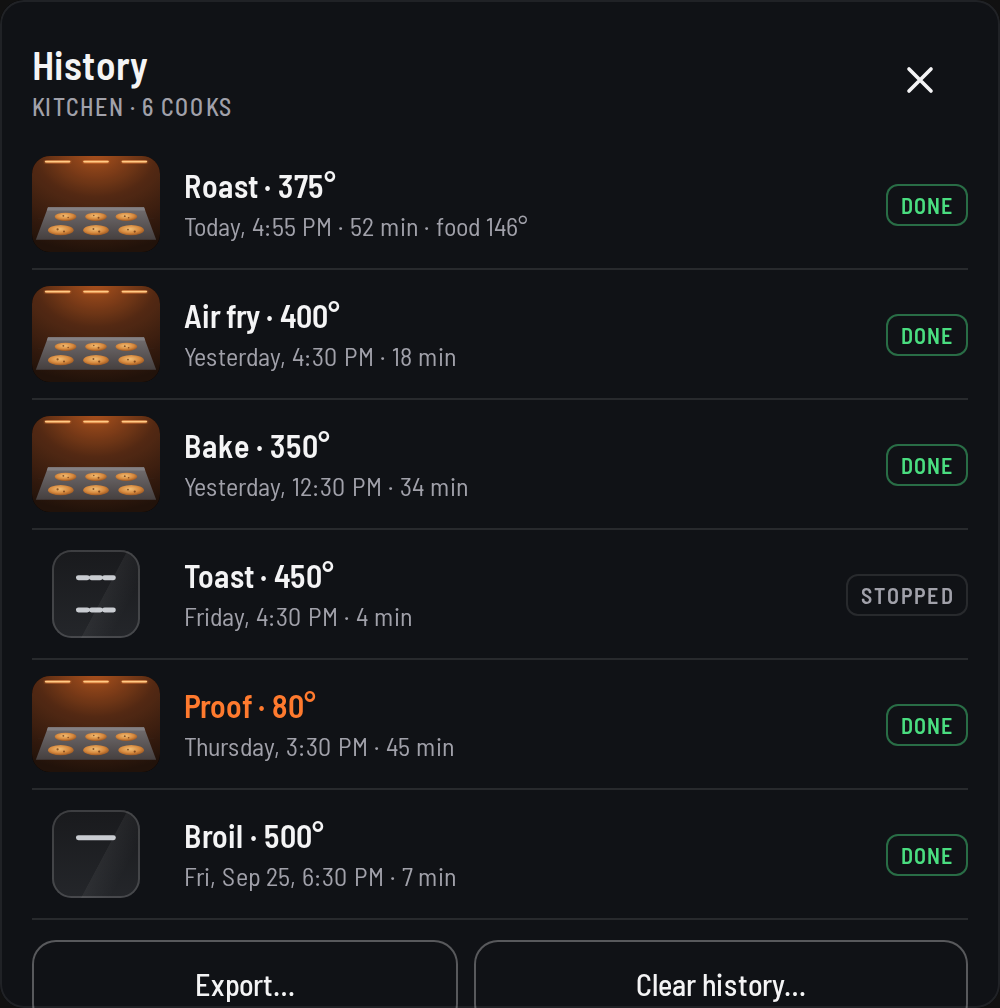
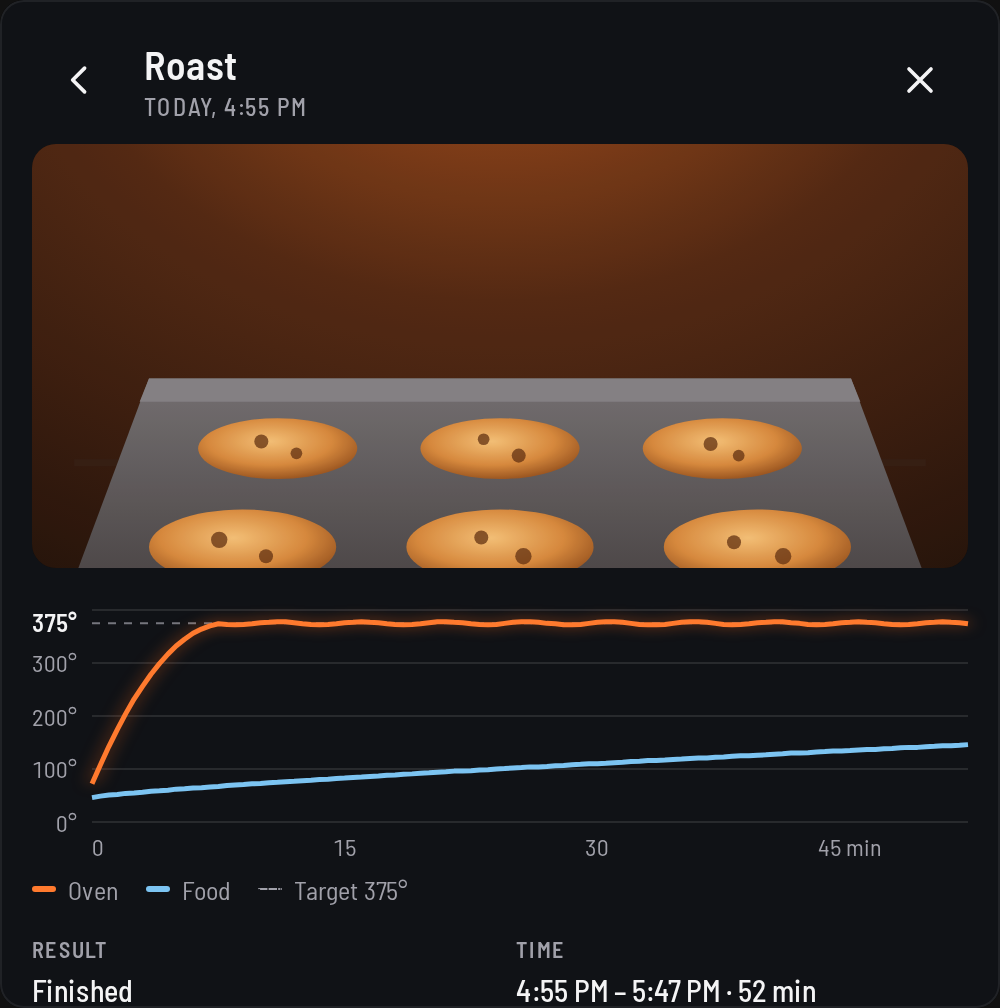
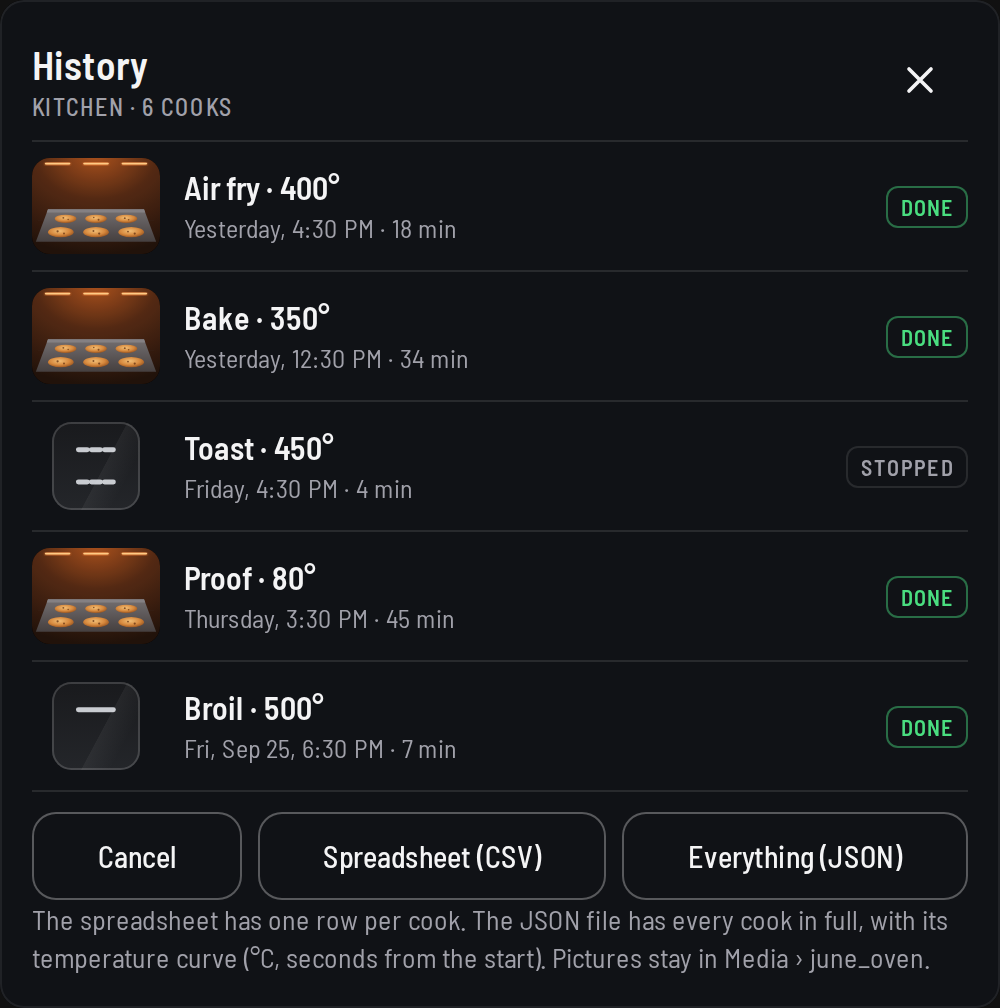
The integration records each cook when it ends, in Home Assistant, so it survives restarts and every browser sees the same list. The History tile shows them, newest first, with each cook's picture, target, time and result.
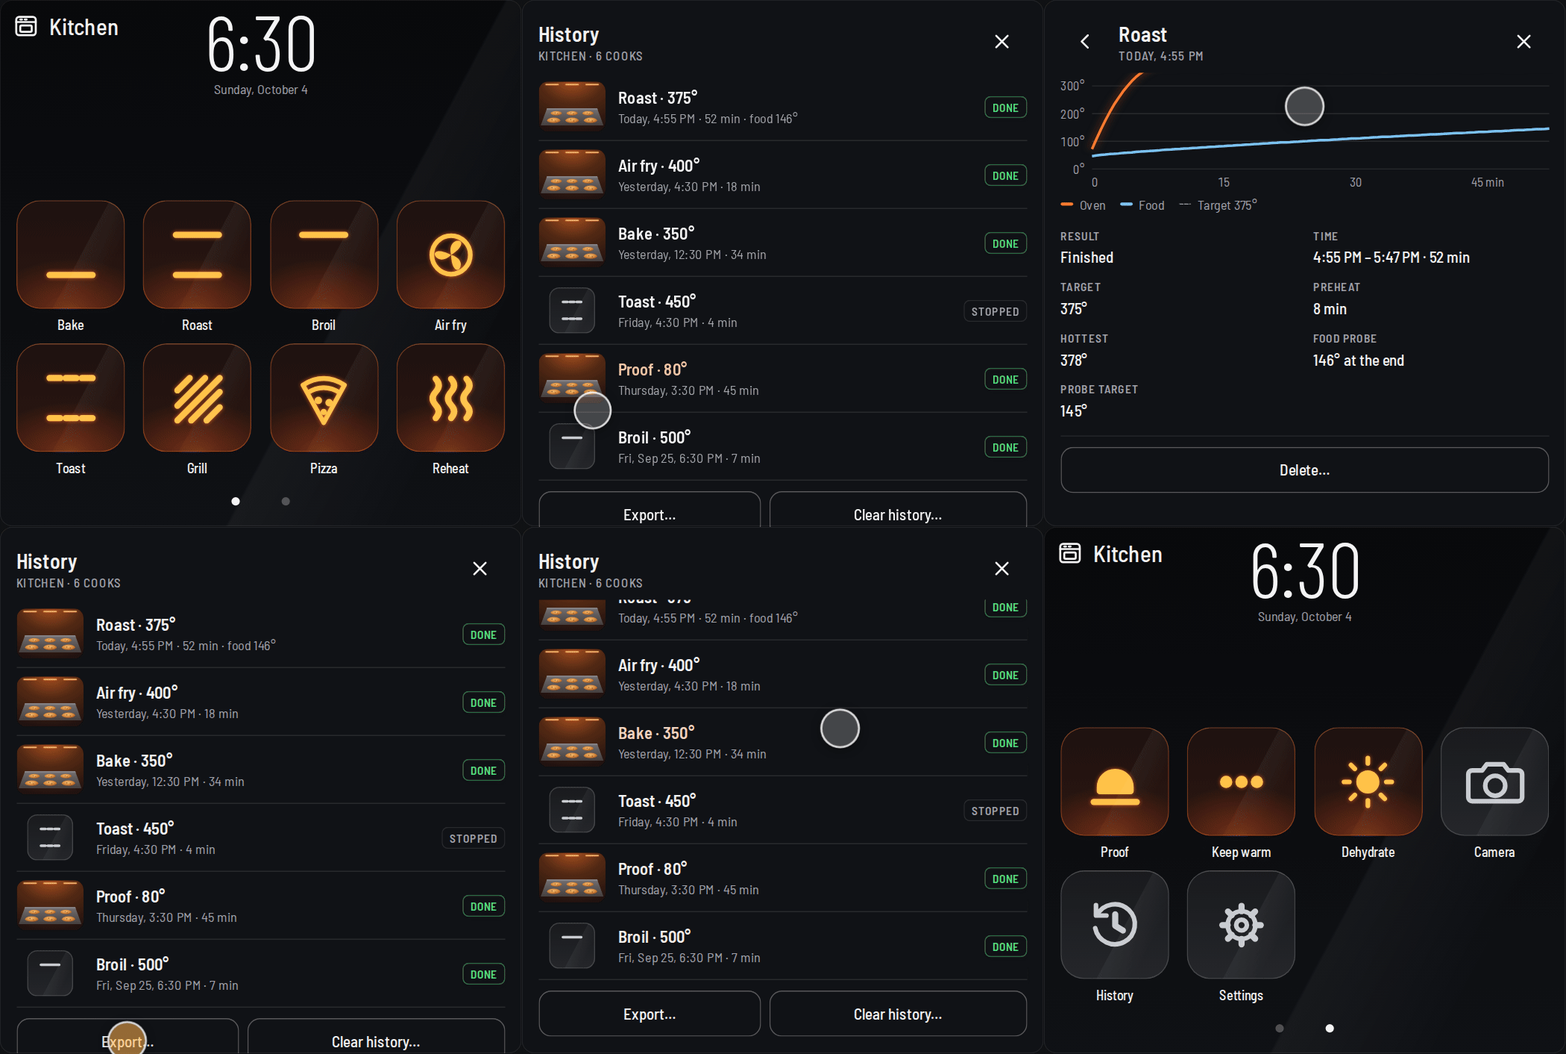
Tap a cook for its last camera picture, its whole temperature curve (oven, and food from the June probe or the thermometer chosen under Settings › Food probe) and its details: result, time, length, target, hottest reading, preheat time and food temperature.
Export… at the bottom of the list saves the history as a file: Spreadsheet (CSV) has one row per cook, Everything (JSON) has every cook in full with its temperature curve. Pictures stay in Media › june_oven.
A single cook, or the whole history, can be deleted from there. The integration keeps the newest 200 cooks per oven; recording and pictures can each be turned off in the integration's options.
Each finished cook also fires a june_oven_cook_finished event, handy for a cook log or a notification.
One card for every oven in the house
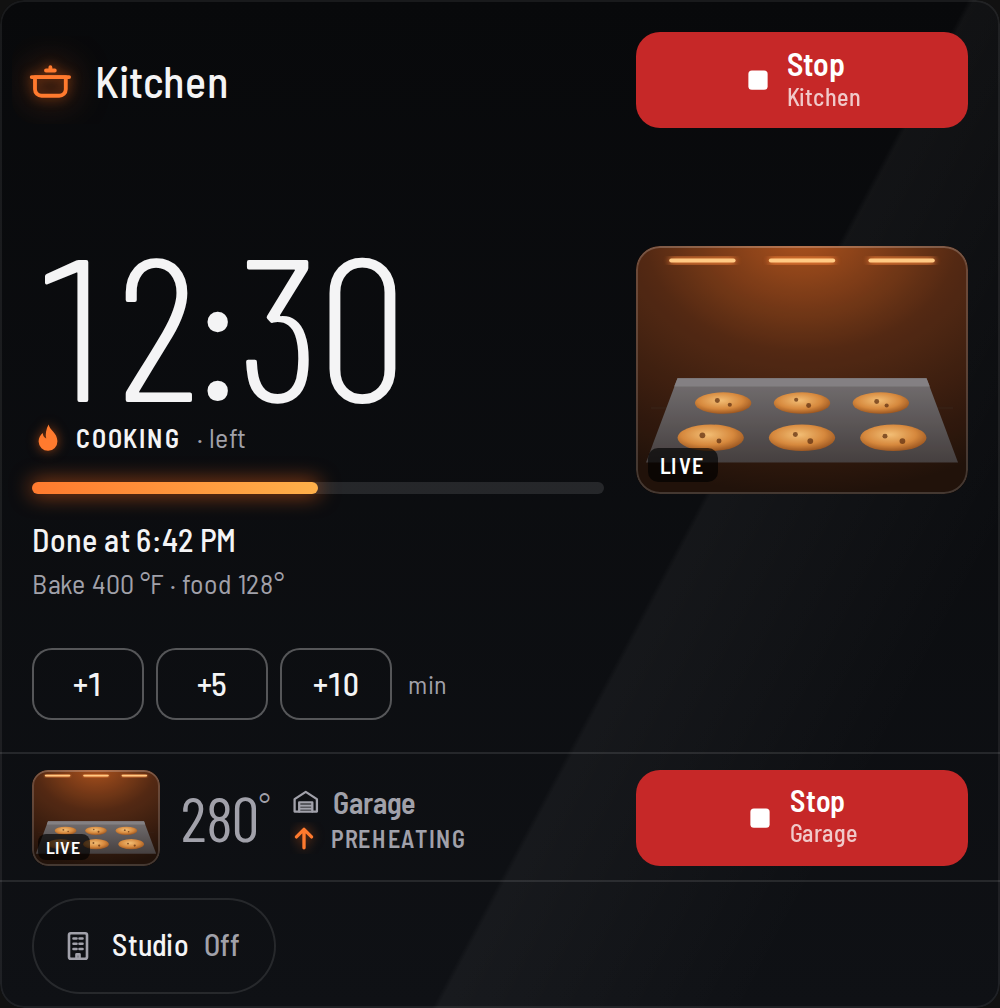
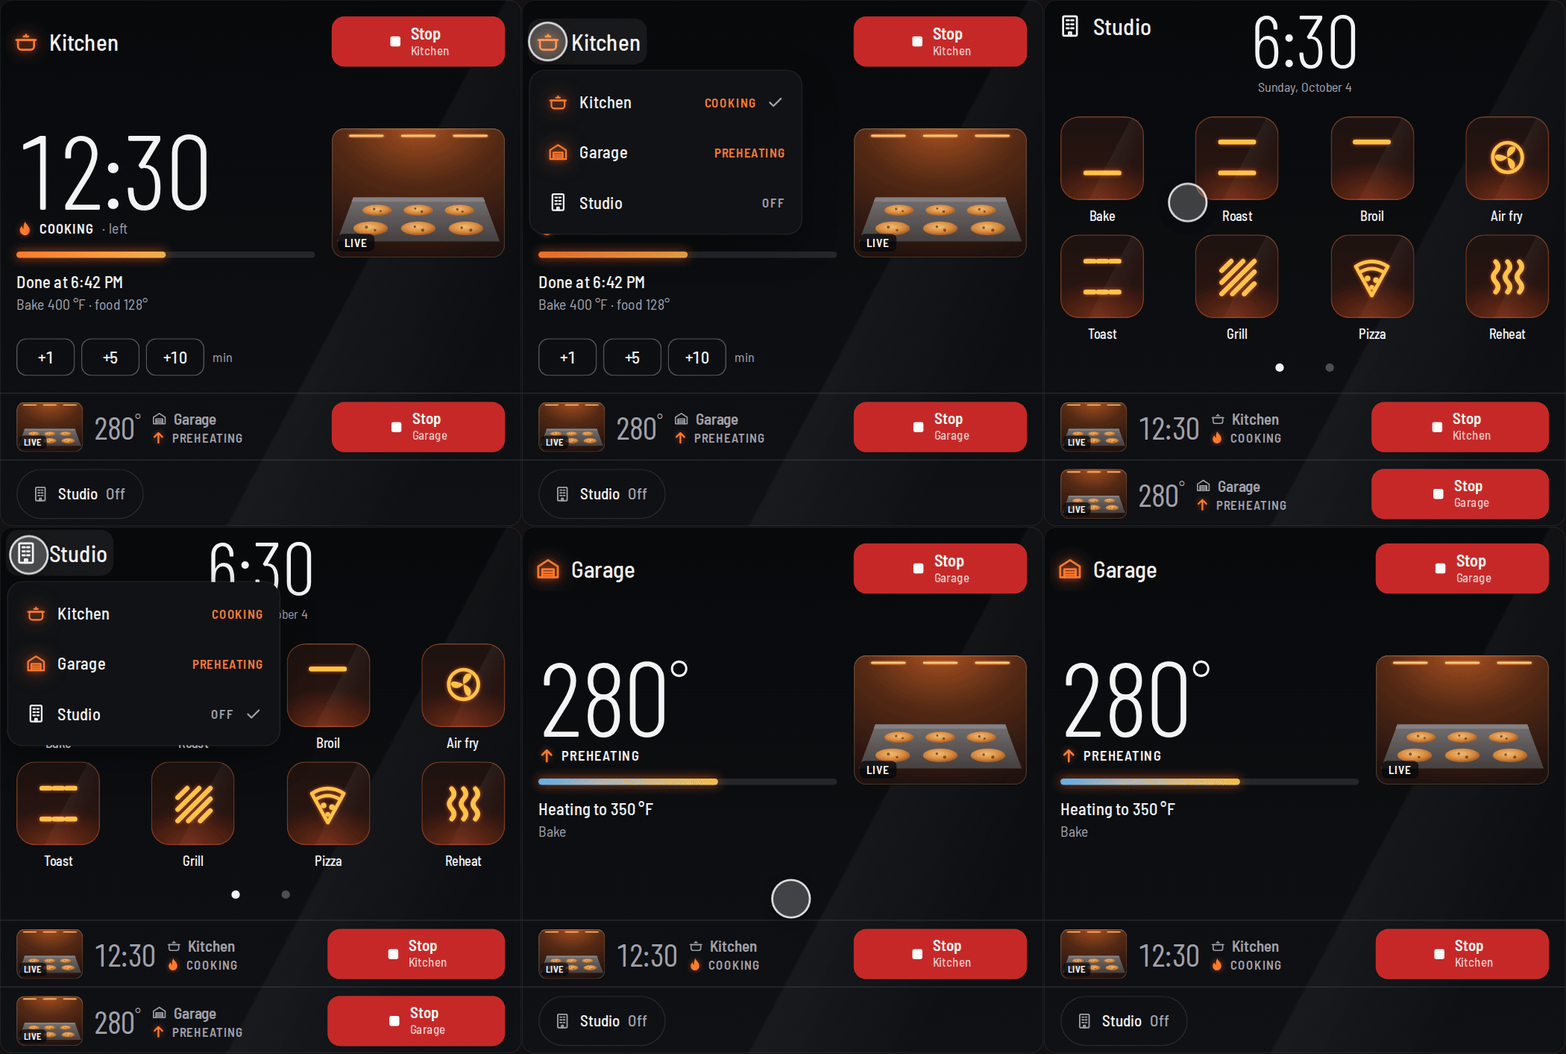
Add more ovens to the same card. The oven that's heating gets the full card, other heating ovens get a row with their own Stop, and ovens that are off share one row of small buttons.
type: custom:july-oven-card
entity: climate.kitchen_oven
icon: kitchen
entities:
  - entity: climate.garage_oven
    icon: garage
  - entity: climate.studio_oven
    icon: mdi:home-city
    name: Studio
Make it yours, right in the card
The Settings tile opens the card's own settings: the look, the camera, the name, the layout of the mode tiles, the card's size, the food probe and each oven's icon. Choices are saved in this browser, so a wall tablet and your phone can each look the way you like. Your YAML is the starting point, and Reset goes back to it.
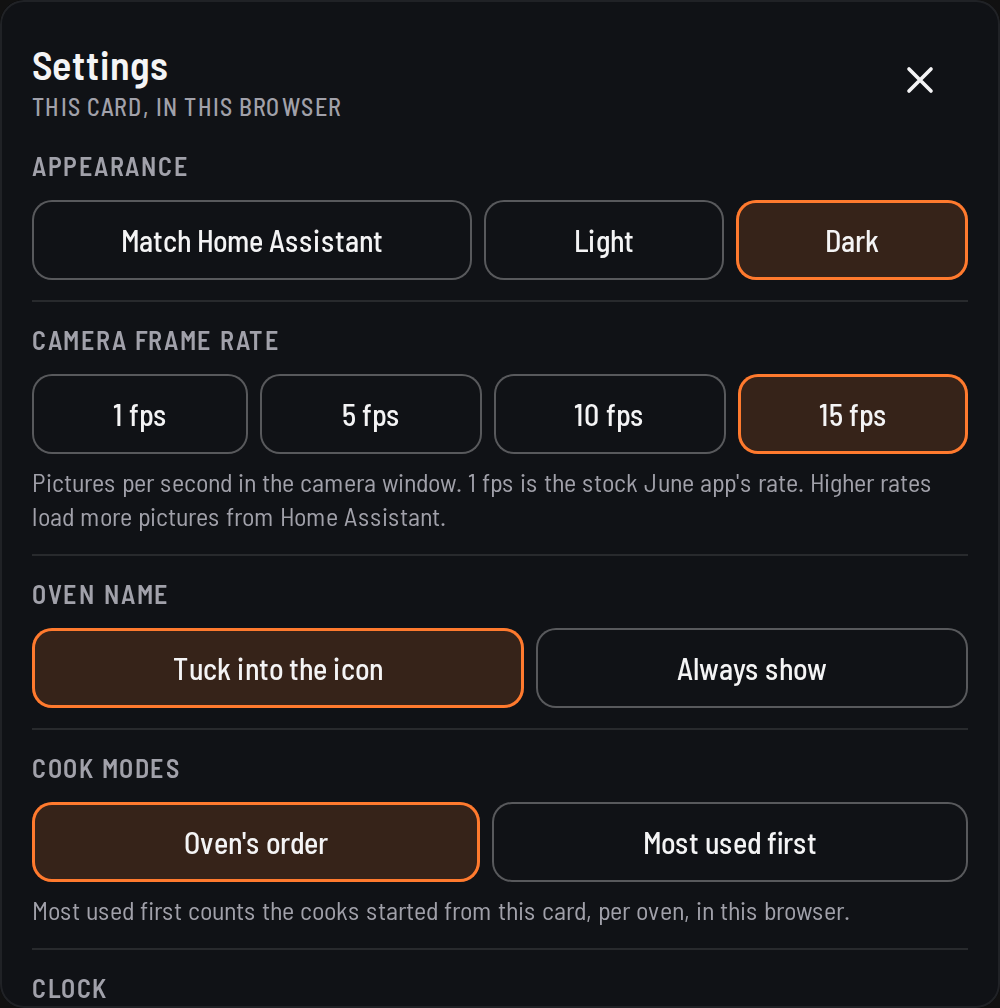
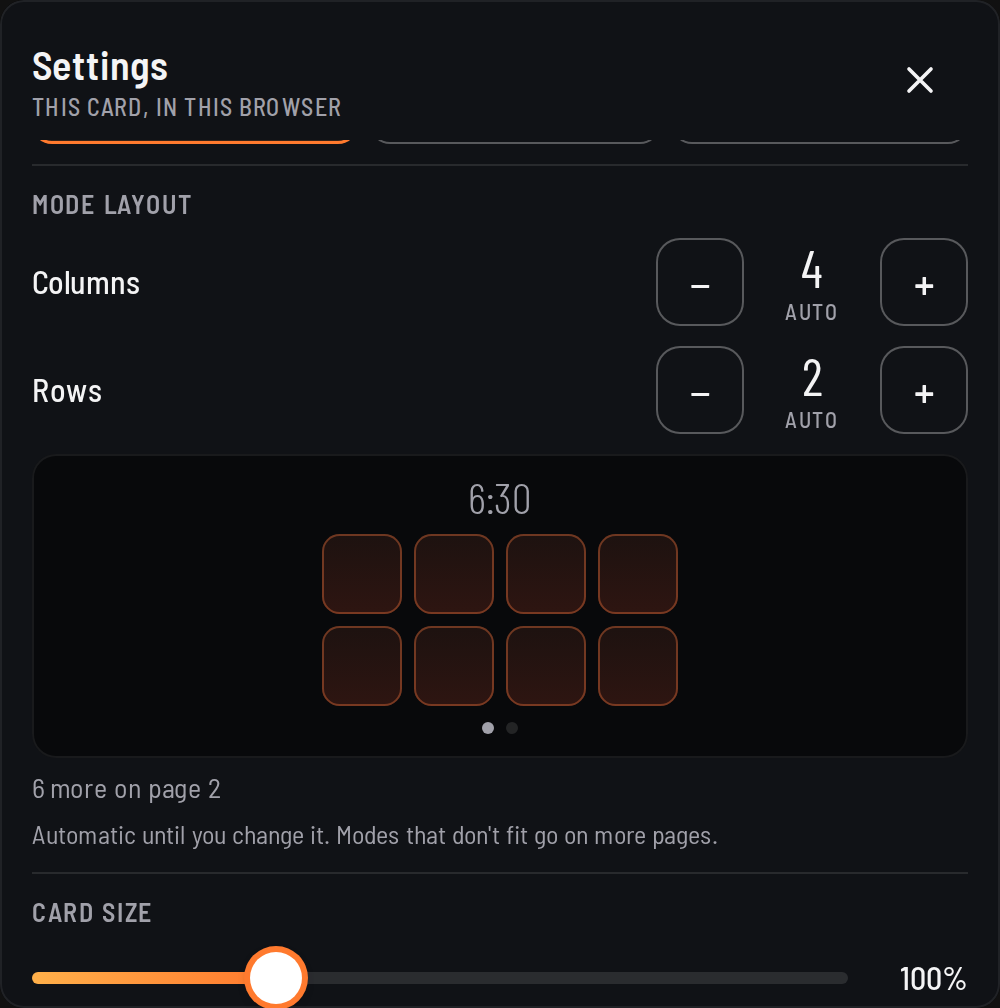
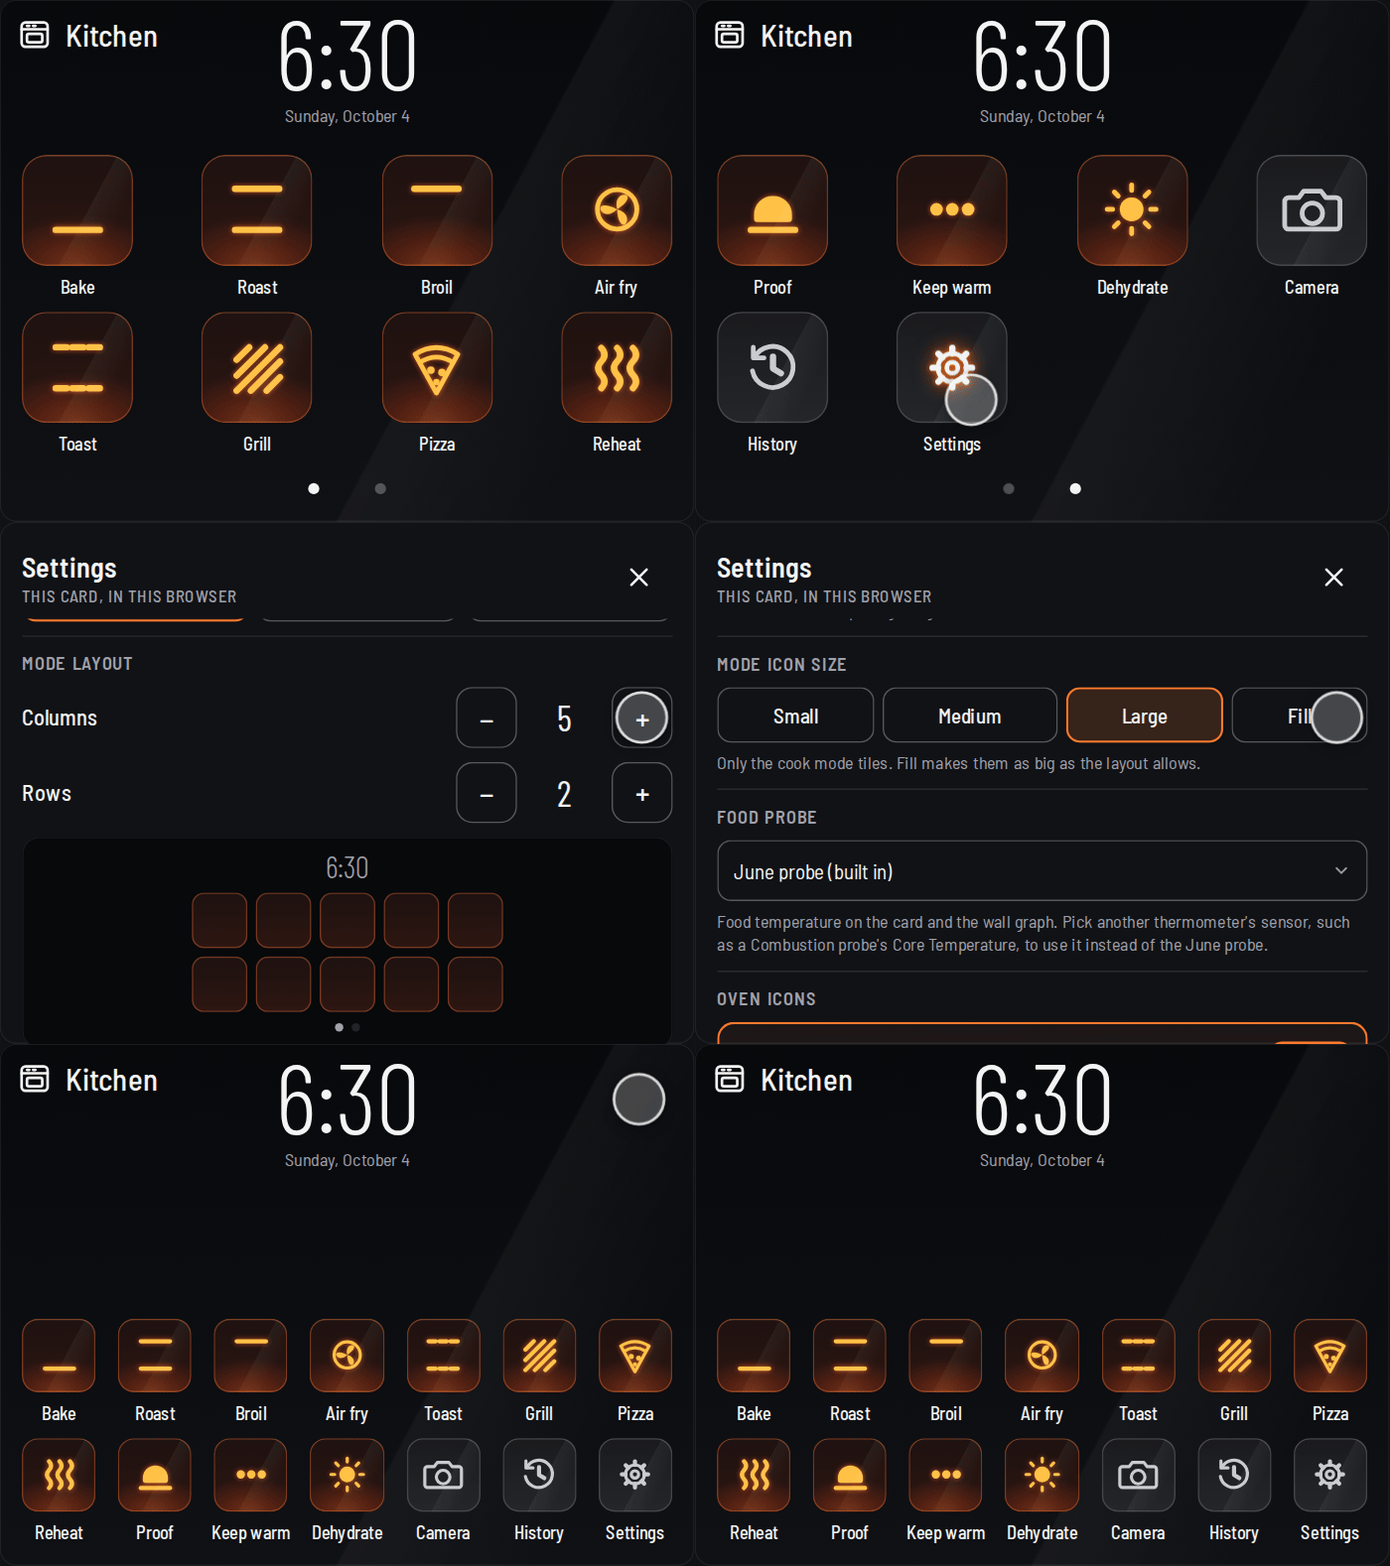
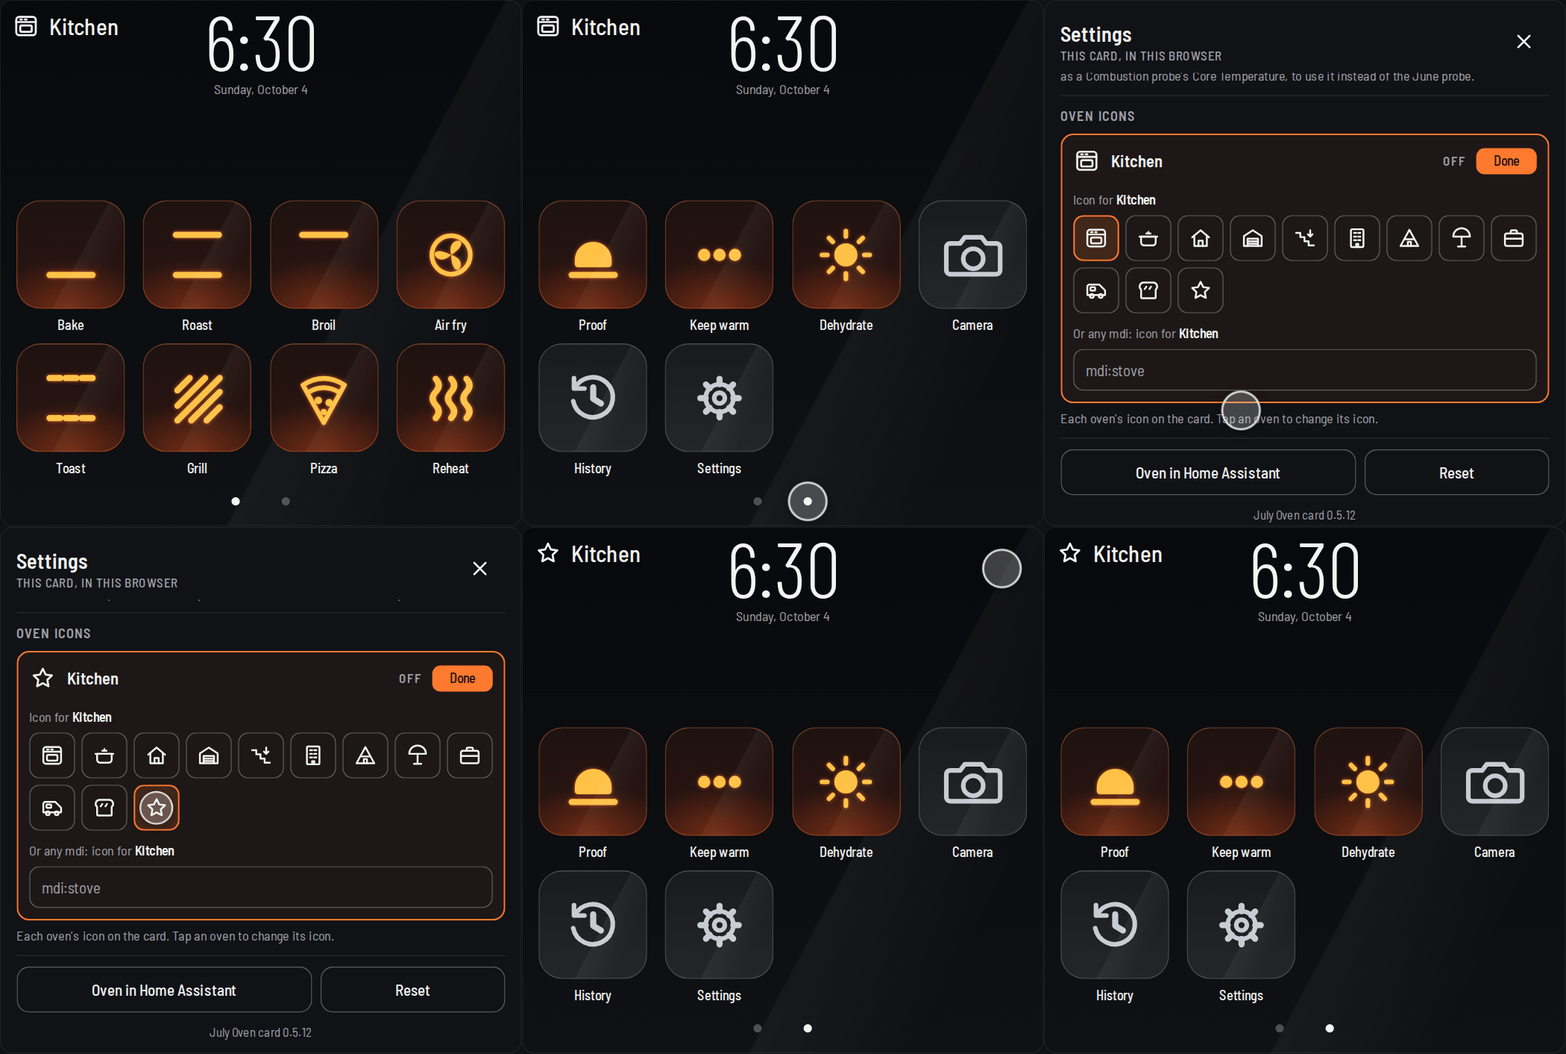
mdi: icon; the card changes as you tap. The version is at the bottom.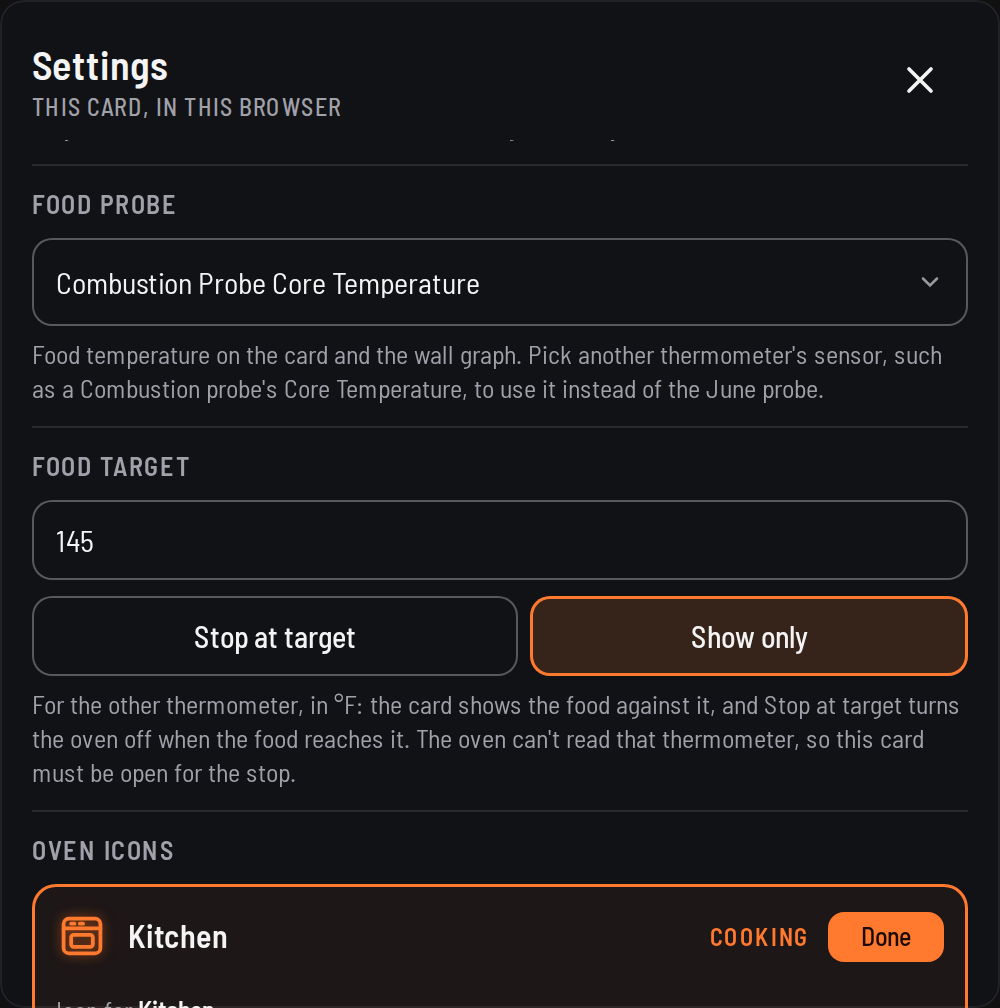
Under Food probe, pick any Home Assistant temperature sensor to use instead of the June probe. Combustion probes' Core Temperature is listed first. The card and the graphs then show that thermometer's reading as the food temperature.
Food target sets its target. With Stop at target, the card turns the oven off when the food reaches it. The oven can't read that thermometer, so a card has to be open for the stop to happen.
| Setting | Choices | YAML key |
|---|---|---|
| Appearance | Dark (the default, the oven's own glass), Light, or Match Home Assistant | theme |
| Camera frame rate | 1, 5, 10 or 15 fps (default 15; 1 is the stock June app) | camera_fps |
| Oven name | Tuck into the icon after 5 s, or always show | hide_name |
| Cook modes | The oven's order, or most used first (counted per oven, in this browser) | mode_order |
| Mode layout | Columns 1–7 and rows 1–3, or automatic | columns, rows |
| Card size | 80–150%: text, buttons and spacing | scale |
| Mode icon size | Small, Medium, Large (default) or Fill | icon_size |
| Clock | Automatic, 12-hour or 24-hour | clock |
| Food probe | The June probe, or any temperature sensor, per oven | probe |
| Food target | The other thermometer's target, and Stop at target or Show only | food_target, food_auto_stop |
| Oven icons | 12 built-in icons or any mdi: icon, per oven | icon |
| Oven in Home Assistant | Opens the oven's device page | none |
From one row to the wall tablet
On a sections dashboard the card picks its layout from its size: standard is 12 × 6, wall tablet is full width × 8, compact is 12 × 1, and each extra oven adds a row. In a panel view the card fills the window. Set display_mode to choose one yourself.



When something looks off
The card looks like an older version
Open the card's Settings and check the version at the bottom. If it isn't the latest, select Redownload in HACS, restart Home Assistant and hard-refresh the browser tab (Ctrl+Shift+R, or Cmd+Shift+R on a Mac).
Also check Settings › Dashboards › Resources for a /local/july-oven-card.js entry left over from a manual copy, and remove it. The integration loads the card for you.
A grey panel shows for a moment
That's the loading panel. It appears only if Home Assistant takes longer than a third of a second to finish loading the dashboard after a refresh, and the card replaces it as soon as it's ready.
The oven won't start from the card
When the oven refuses, the card says why in plain words:
- Remote start is off on this oven. On the oven, open Settings › App permissions and turn it on.
- Close the oven door, then try again.
- There is food or a probe in the oven. Take it out before preheating.
- The oven is cleaning, or isn't ready yet. Try again in a moment.
Stop at target didn't turn the oven off
The oven can't read another thermometer, so the card does the stopping. It only works while a card showing that oven is open in a browser.
The camera says Camera off
The oven only sends pictures while it heats, unless it runs the Project July local server, which can wake the camera when you open the window. Start a cook and pictures appear within a second or two. If the oven is heating and the window says Waiting for a picture, the oven hasn't sent one yet.
The card says Offline
Home Assistant hasn't heard from the oven for a while. The card keeps the last reading and says how long ago it was seen. Check that the oven is on your network and that the oven's address in the integration's options is still right.